Exports or PDFs run from our server will be placed on your server desktop, however often you will need to copy this file locally before you can work on it or send it away. There are two ways to do this.
Copy / Paste files from the Clipboard
As long as you have enabled clipboard sharing (this is enabled by default) in the Remote Desktop Connection application, you can move files to or from the server by using the Copy (CTRL + C) and Paste (CTRL + V) functions of Windows.
As you cannot right-click on our servers, you can select the file, press CTRL + C to copy it, then minimize the server and go back to your desktop or the folder you wish to place the file. Then use CTRL + V to paste the file. You can then access it as normal.
Drag and Drop files from ‘MY PC’
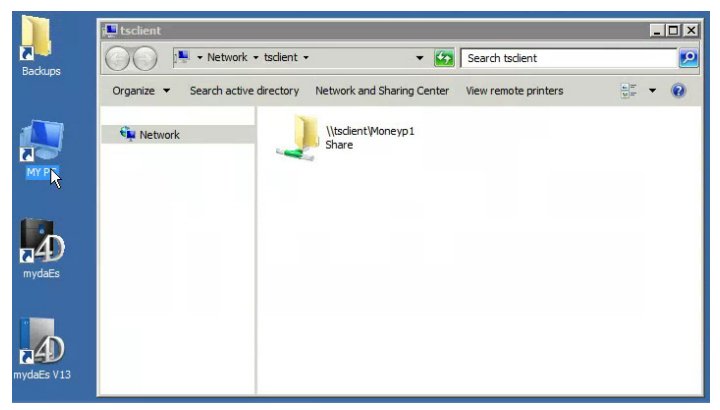
If you’d rather browse your files and drag and drop, from the server desktop go to the ‘MY PC’ icon. If this is blank when you open it, you will need to enable drive sharing from the Remote Desktop Connection application, full instructions are available here.
Then once logged into the server, double click the ‘My PC’ icon on your desktop. This will bring up a list of shared folders as selected above, You can go into these to view the files & folders inside them.
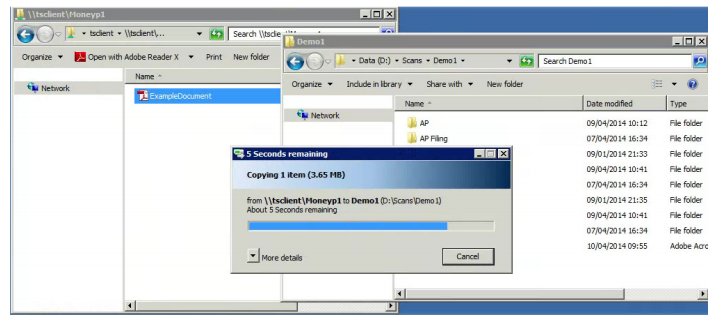
 From here, you can drag and drop any files between this window and the server and vice versa to copy them. If you’re are not moving the files to/from the desktop, open both windows next to each other as shown below and move the files as necessary.

Setup a shortcut
It can be annoying to have to browse to the same folder every time by going through ‘MY PC’, but you can create a shortcut to a folder inside there to make things a bit easier. Browse MY PC and find the folder you wish to create a shortcut too, then instead of opening it hold the ALT key and drag the folder to your server desktop. This will create a shortcut to that folder, so that in future you can access it by opening the shortcut rather than navigating via MY PC. You can also drag and drop exports or save PDFs directly to your shortcut.
