Copy / Paste files from the Clipboard
Microsoft Remote Desktop 10 now has clipboard support, so as long as you have enabled clipboard sharing (this is enabled by default) in the Remote Desktop Connection 10 application, you can move files to or from the server by using the Copy (CMD + C) and Paste (CMD + V).
As you cannot right-click on our servers, you can select the file, press CMD + C to copy it, then minimize the server and go to the folder you wish to place the file. Then use CMD + V to paste the file. You can then access it as normal.
Setup a folder for the server to access
The first step in copying files between your MAC and the server is changing your Remote Desktop Client settings to ensure a folder has been shared with the server. See below for instructions on how to do this for your client:
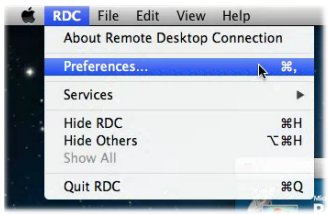
- Open Microsoft Remote Desktop 10.
- Select your connection and hit ‘Edit’. If you do not have a connection in the list, see full instructions on setting up a connection here.
- Go into the ‘Local Resources’ tab and tick Folders. Then hit the + and give the folder a name of your choosing, then browse for the path. This will allow you to move files (Exports, PDFs) between the server and your selected folder(s).
- Hit the X at the top to close the editing screen. You should now be able to login to the server and access your files.
- Open Microsoft Remote Desktop.
- Select your connection and hit ‘Edit’. If you do not have a connection in the list, see full instructions on setting up a connection here.
- Go into the Redirection tab and tick Enable folder redirection. Then hit the + and give the folder a name of your choosing, then browse for the path. This will allow you to move files (Exports, PDFs) between the server and your selected folder(s). To allow access to all folders, place a forward slash (/) in the Path.
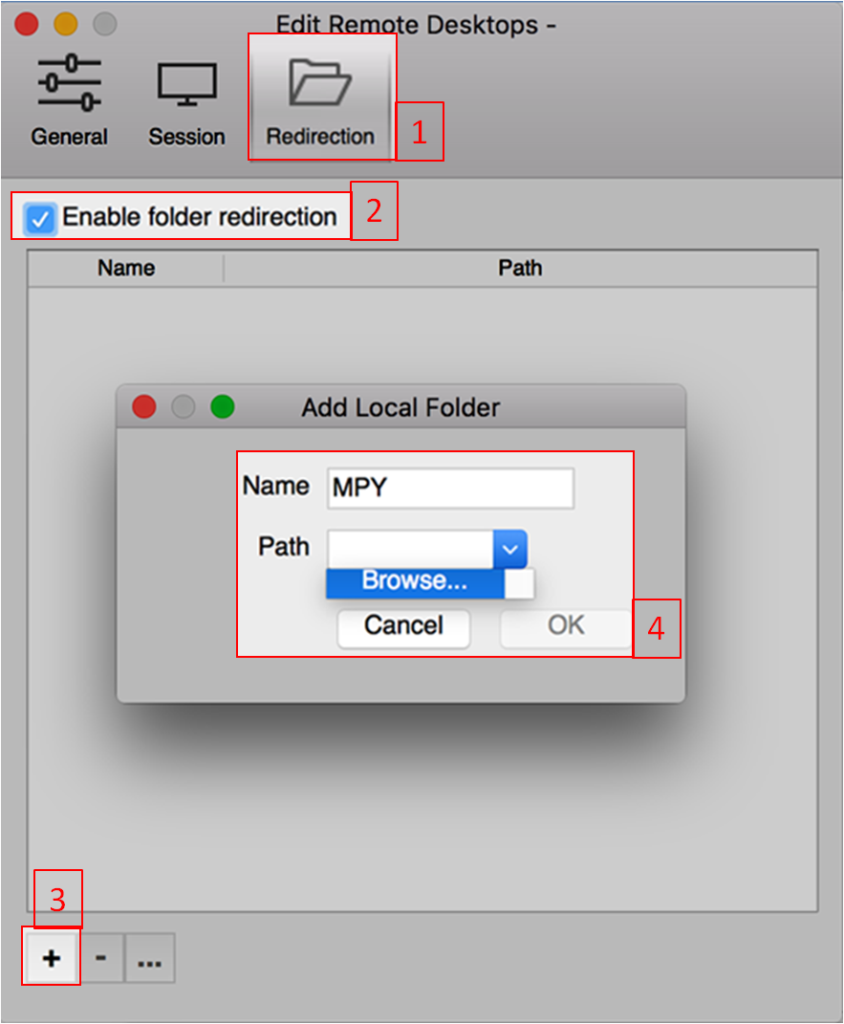
- Hit the X at the top to close the editing screen. You should now be able to login to the server and access your files.
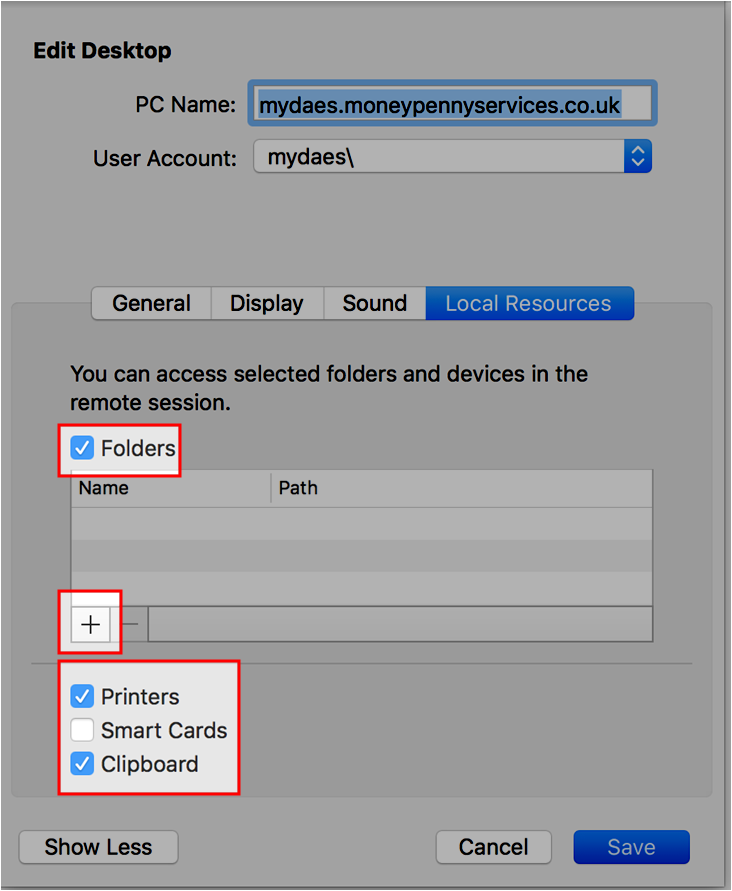
- While logged out of the server, open the RDC software on your MAC, then from the ‘RDC’ menu select ‘Preferences’
- Go to the ‘Drives’ tab, and in the dropdown box choose a folder to share and be visible when you are on the server. ‘All disk drives’ will share all the folders on your MAC, or click ‘Other Folders’ to select a specific folder to share.
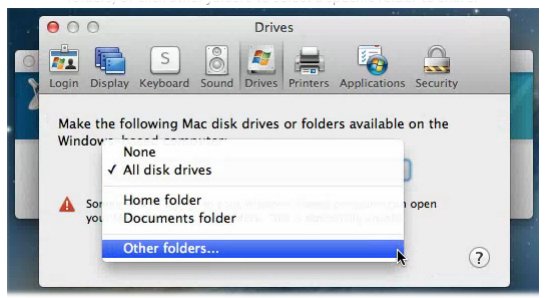
- Once you have selected an option, exit this window. If it asks you to save changes to the RDP file, say ‘Yes’.
- Log back into the server.
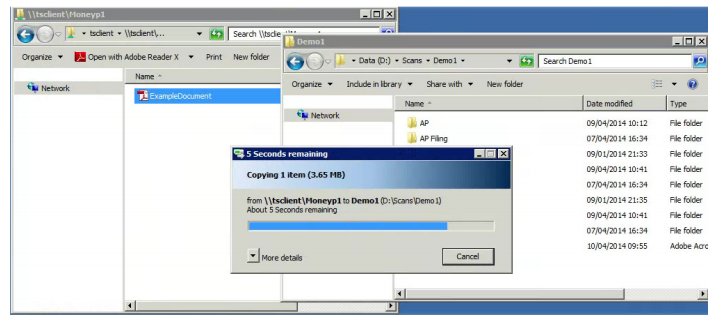
Transfer files between the server and your shared folders
Once your share has been setup, when you are logged into the server double click the ‘My PC’ icon on your desktop. This will bring up a list of shared folders as selected above, You can go into these to view the files & folders inside them.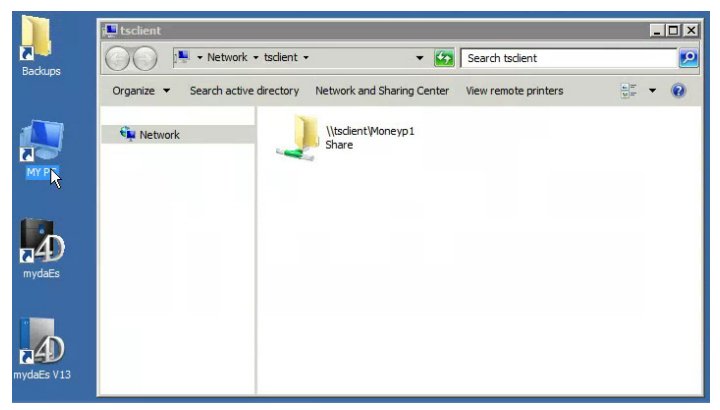
From here, you can drag and drop any files between this window and the server and vice versa to copy them. If you’re are not moving the files to/from the desktop, open both windows next to each other as shown below and move the files as necessary.