1. Home
  2. Getting Started
  3. Moneypenny Server Installation (Mac)

Moneypenny Server Installation (Mac)

Instructions to connect up to the Moneypenny Server via Mac. If you are using a PC,
click here.

Install Remote Desktop Connection

If you already have the Microsoft Remote Desktop Connection 10 application or greater, skip to the next section.

  1. Head to the Mac App Store and Download the Microsoft Remote Desktop client.
  2. Once installed, you will now have a program in your Dock called Remote Desktop Connection.

Automatic Setup

Please ensure that you have Microsoft Remote Desktop 10 before doing this

Select your region below, then right-click the link below and choose Save Link As (or Download linked file as), then select the Desktop or another folder you can navigate to.

Australia
New Zealand
United Kingdom
South Africa

Once done, open the ‘Microsoft Remote Desktop’ application and go to ‘Cogwheel > Import Desktops…’ and select the .rdp file that you downloaded. This will import our default settings in, or you can setup from scratch in the ‘Manual Setup’ section.

If you’re unsure how to open the Microsoft Remote Desktop program, go to the search icon in the top-right of your Mac and search for the application. We recommend once this is open to right-click it on your dock and select ‘Options > Keep in Dock’ for ease.

Manual Setup

  1. Open Microsoft Remote Desktop.
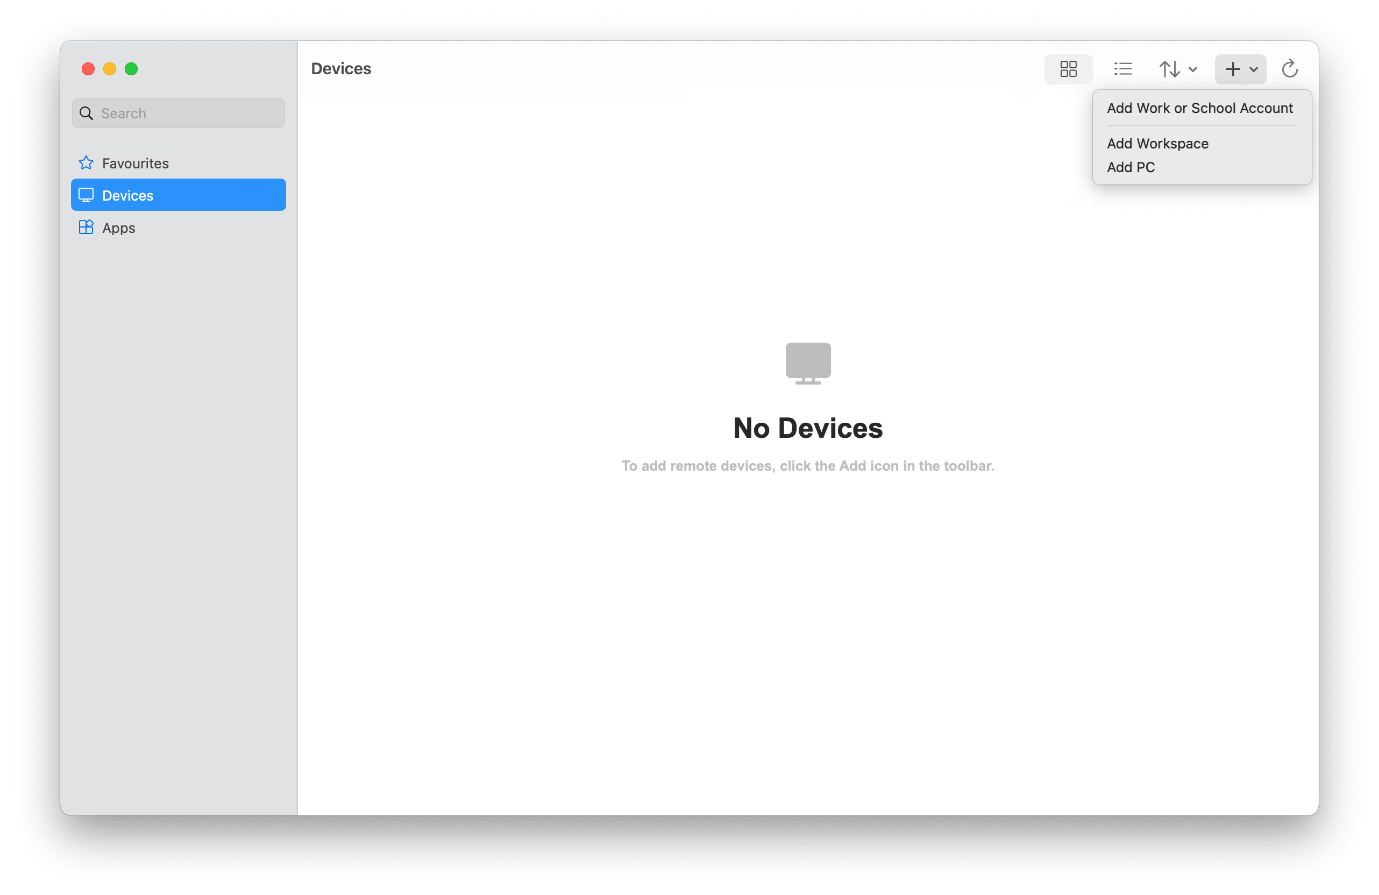
  2. Click the + Dropdown and select Desktop
  3. Here you’ll set the PC Name and input your credentials:
    PC Name: Set to below for your region:

    aus.mydaes.online

    nz.mydaes.online

    uk.mydaes.online

    mydaes.moneypennyservices.co.za


    Hit the dropdown for “User Account” and go to “Add User Account…”
    User name: mydaes\username this is provided in the setup email
    Password: This is provided in the setup email
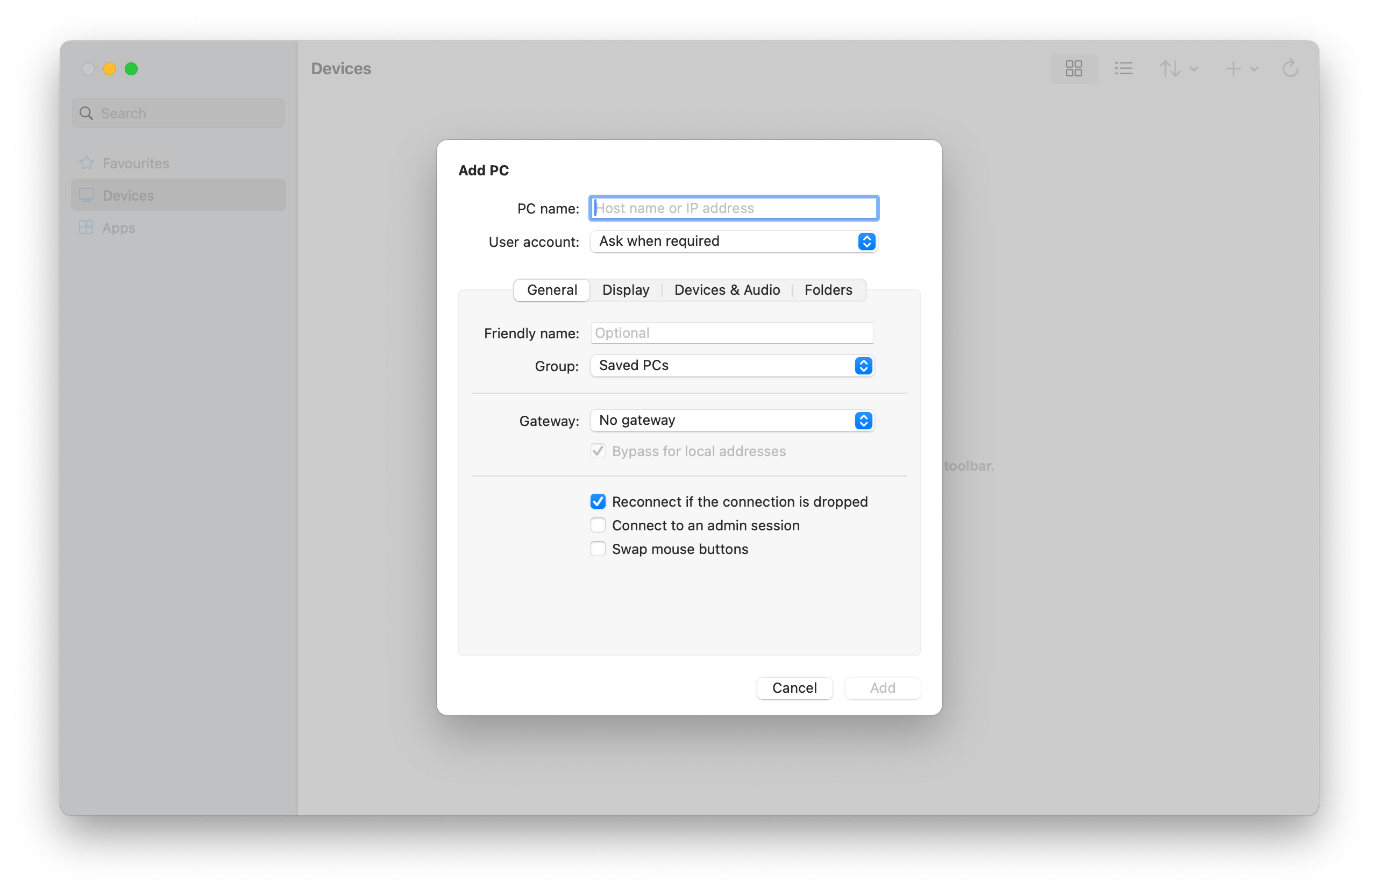
  4. [Recommended] Right Click your newly created desktop, click edit and go to the Local Resources tab and tick Folders, Printers and Clipboard.
    Hit the + and give the folder a name of your choosing, then browse for the path. This will allow you to move files (Exports, PDFs) between the server and your selected folder(s). To allow access to all folders, place a forward slash (/) in the Path or select Macintosh HD.

  5. Close the Edit Remote Desktops window and open the connection file you created. You may be warned about the security, if this happens continue.
  6. Before the login-screen appears, you may be asked to confirm that you would like to access your Drive, Clipboard and Printers. Select “Do not ask again for connections to this computer and click Connect.
  7. You may be asked to verify the certificate. If this happens you can either click Continue (will pop-up each time you connect) or click ‘Show Certificate‘ and tick the ‘Always trust‘ option to skip this each time.
  8. Type in your Username and Password as provided.

Right Clicking

Please note that mydaEs uses in a number of areas a ‘right click’ context sensitive menu. Even though the Apple designers have sometimes done away with a right click button on your mouse, it is still possible to bring up the context sensitive menus on your MAC in a number of ways.

If you have a Trackpad, the default behaviour for a ‘Secondary Click’ is clicking with two fingers next to each other at the same time. You can of course though alter this behaviour in ‘System Preferences’ – ‘Trackpad’.

If you have an external one button mouse, you will have to hold down the Ctrl key before you click your main mouse button to trigger the right click menu.

If your mouse supports it though, you will have options in ‘System Preferences’ – ‘Mouse’ to configure what action triggers the right click menu.

Please note, that a right click menu is not only used on mydaEs, it is commonly used throughout your MAC software.

Was this article helpful?

Related Articles