
Why is the Moneypenny font so tiny?
Technology is improving all the time. Recently, newer laptops running high DPI displays are becoming increasingly common, and while having a high resolution display can lead to crisp, clear images it can be tricky when it comes to scaling applications properly. Microsoft has acknowledged that high DPI devices like the Surface can have issues such as text being too small or large, blurry or fuzzy due to these difficulties.
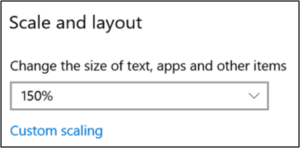
Most applications get around this by using the scaling feature built into windows. By making your apps scale their size by percentage, the application will look normal even when using a small display with a high resolution.
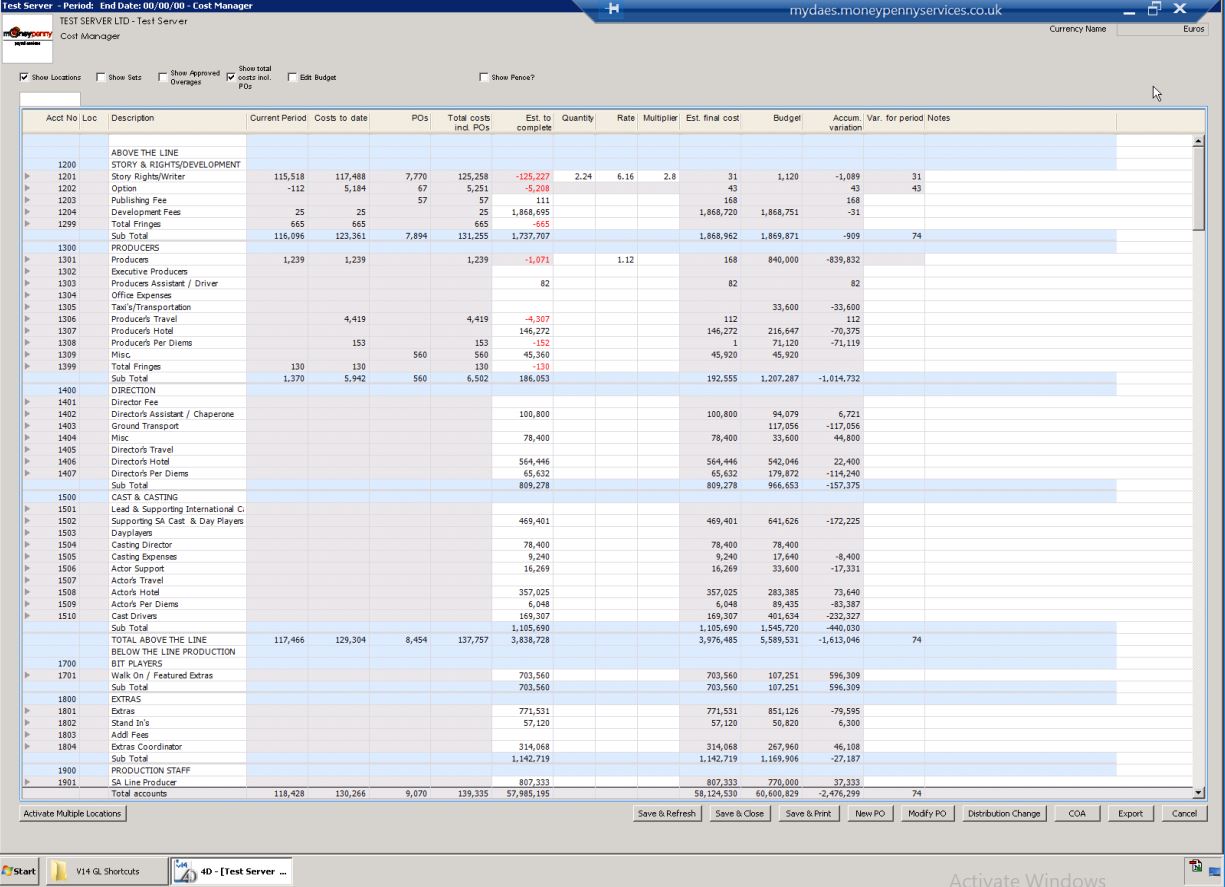
Currently, the Remote Desktop Connection client built into windows does not apply this scaling. This means while your normal applications are being made 50% bigger, the connection to our server is not affected. This can result in very small, near unreadable text sizes like the below (click to enlarge):
Solutions
Thankfully, there are several workarounds to this problem that can bring things back up to size. As this issue stems from having a high resolution (1920 x 1080 or greater) on a small monitor, there’s a few solutions:
Use a second monitor
While this isn’t an option for everyone (portability is a big factor!), the easiest solution to this is to use a second monitor with a normal DPI like a 23.9″ display at 1920 x 1080 resolution. You can then move the Remote Desktop Connection program onto this secondary display and see if things are looking better.
Once you’ve plugged in your second display, you’ll notice that Remote Desktop Connection will still default to your initial display and thus the initial resolution. To change this, first find out the resolution of the second display by right-clicking your desktop, click ‘Display Settings’, select the monitor in the second position and scroll down to ‘Resolution’. Keep a note of this number.
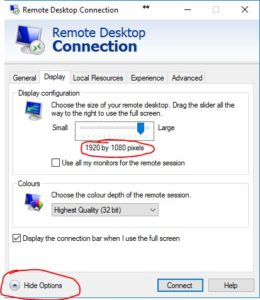
Then, right-click your Moneypenny Server shortcut (if you need one, go here) and select edit, ‘Show Options’ in the bottom left and go to the Display tab. Adjust the slider until your resolution matches that of the second monitor instead of Full Screen.
Once done, go to the General tab and hit ‘Save’ so that your changes will always apply, then you can connect. You can then move the window from your main display onto your secondary display by dragging the blue slider at the top down and across.
Adjust your resolution and display settings
By right-clicking on your desktop and clicking ‘Display Settings’, you can adjust the scaling % and resolution directly. This will vary from laptop to laptop, however you generally want to try and lower the resolution by a proportionate amount to the scaling. Keep a note of your original settings in-case you want to revert back, then try adjusting incrimentally. For example, if you’re on 150% scaling and 1920 x 1080 resolution, try lowering to 100% scaling and 1280 x 720 or 125% scaling and 1366 x 768. This can require some tweaking to find a setting that works well for you as it will affect all applications. If this causes anything to look blurry or fuzzy, please revert back to your initial settings and try the next option.
Add a .manifest file (Windows 10)
This method allows Windows to use a manifest file to modify the Remote Desktop Connections DPI settings.
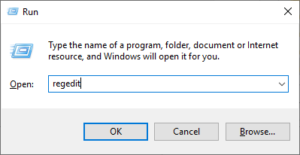
- Bring up the ‘Run’ dialog by right-clicking the start menu and selecting ‘Run’ or by pressing the windows key + R
- Type in ‘regedit’ into the Run window, and hit OK.
- On the left hand side, navigate to the below path:
HKEY_LOCAL_MACHINE\SOFTWARE\Microsoft\Windows\CurrentVersion\SideBySide - Right-click on the SideBySide folder and select ‘New > DWORD (32-bit) Value‘

- Rename the value from New Value #1 to ‘PreferExternalManifest’
- Double-click the PreferExternalManifest or right-click modify and change the Value data to 1, then hit OK.
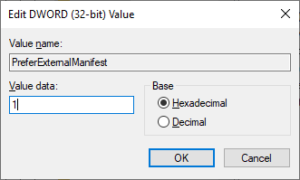
It should look like the below (note, you may have more or less values in the SideBySide folder. This is okay)

- Download the Manifest file here.
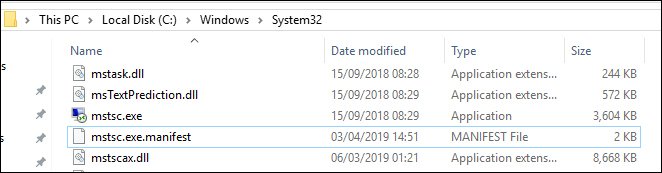
- Right-click the start menu and go to ‘File Explorer’. Select ‘This PC’, then navigate to C:\windows\System32\
- Copy the ‘mstsc.exe.manifest’ file from your downloads into the c:\windows\system32 folder. It should look like below:
This should complete the change. If you have Remote Desktop Connection open, please close any active windows. Once you next open Remote Desktop Connection, it should use the manifest settings and stop the DPI scaling applying to the session.
If you ever wish to undo this, you can delete the mstsc.exe.manifest file. You can also remove the registry entry you created, but please take care not to accidentally remove any extra entries from the registry.
Using Remote Desktop Connection Manager (Alternative client)
If the above methods don’t work for you, Microsoft has an alternative client called Remote Desktop Connection Manager that does support DPI scaling. To set this up follow the below setup instructions.
- Download Remote Desktop Connection Manager and install it, following the on-screen prompts.
- Open File Explorer and navigate to the folder where RDCM was installed. This is normally installed at:
C:\Program Files (x86)\Microsoft\Remote Desktop Connection Manager\
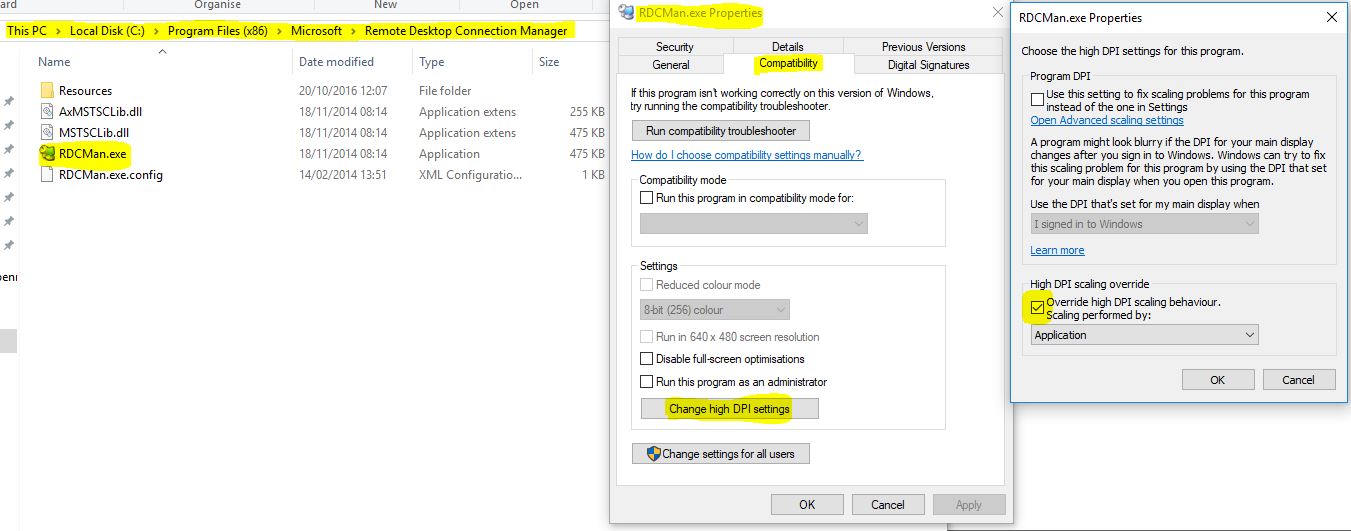
- Right-click on RDCMan.exe and go to Properties. Go to the compatibility tab and select ‘Change High DPI settings’. Then tick ‘Override high DPI scaling behaviour’ and set the scaling to performed by Application.
- Open the ‘Remote Desktop Connection Manager’ program.
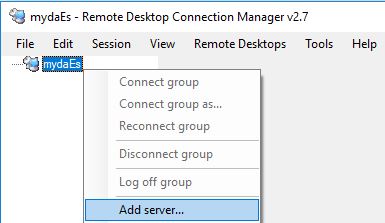
- Go to ‘File > New, and give it a name (e.g. ‘mydaEs’).
- Right-click mydaEs or go to ‘Edit’ and select Add Server.
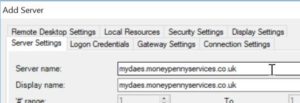
- In the ‘Server Settings’ tab, fill in server name depending on your region below.
- Australia
- New Zealand
- United Kingdom
- South Africa
mydaes.moneypenny.com.au
nz.mydaes.online
mydaes.moneypennyservices.co.uk
mydaes.moneypennyservices.co.za
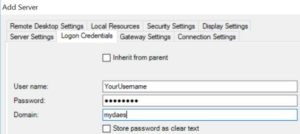
- Under ‘Logon Credentials’, enter your username and password. Set the domain to ‘mydaes’.
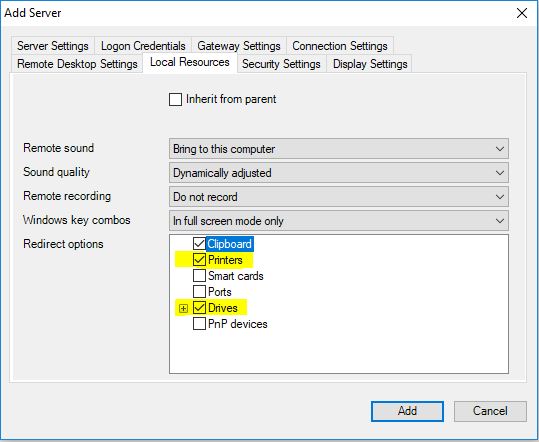
- Go to ‘Local Resources’ and enable Drives and Printers.
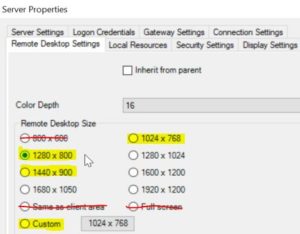
- Go to ‘Remote Desktop Settings’. This will require some tweaking depending on your laptops resolution and there is no perfect value, so you may need to change this setting a few times to find a value that works for you. It’s a good idea to start at 1280 x 800 and work your way upwards from there. We do not recommend going below 1024 x 768 if possible (or as little as possible) as buttons may start displaying incorrectly, and you may wish to use a custom value to find a good fit.
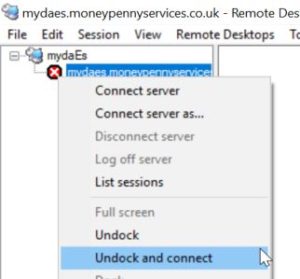
- Hit OK, then right-click on the server name that you setup and select ‘Undock and connect’. You will then have a connection to the server in a window that you can maximize.
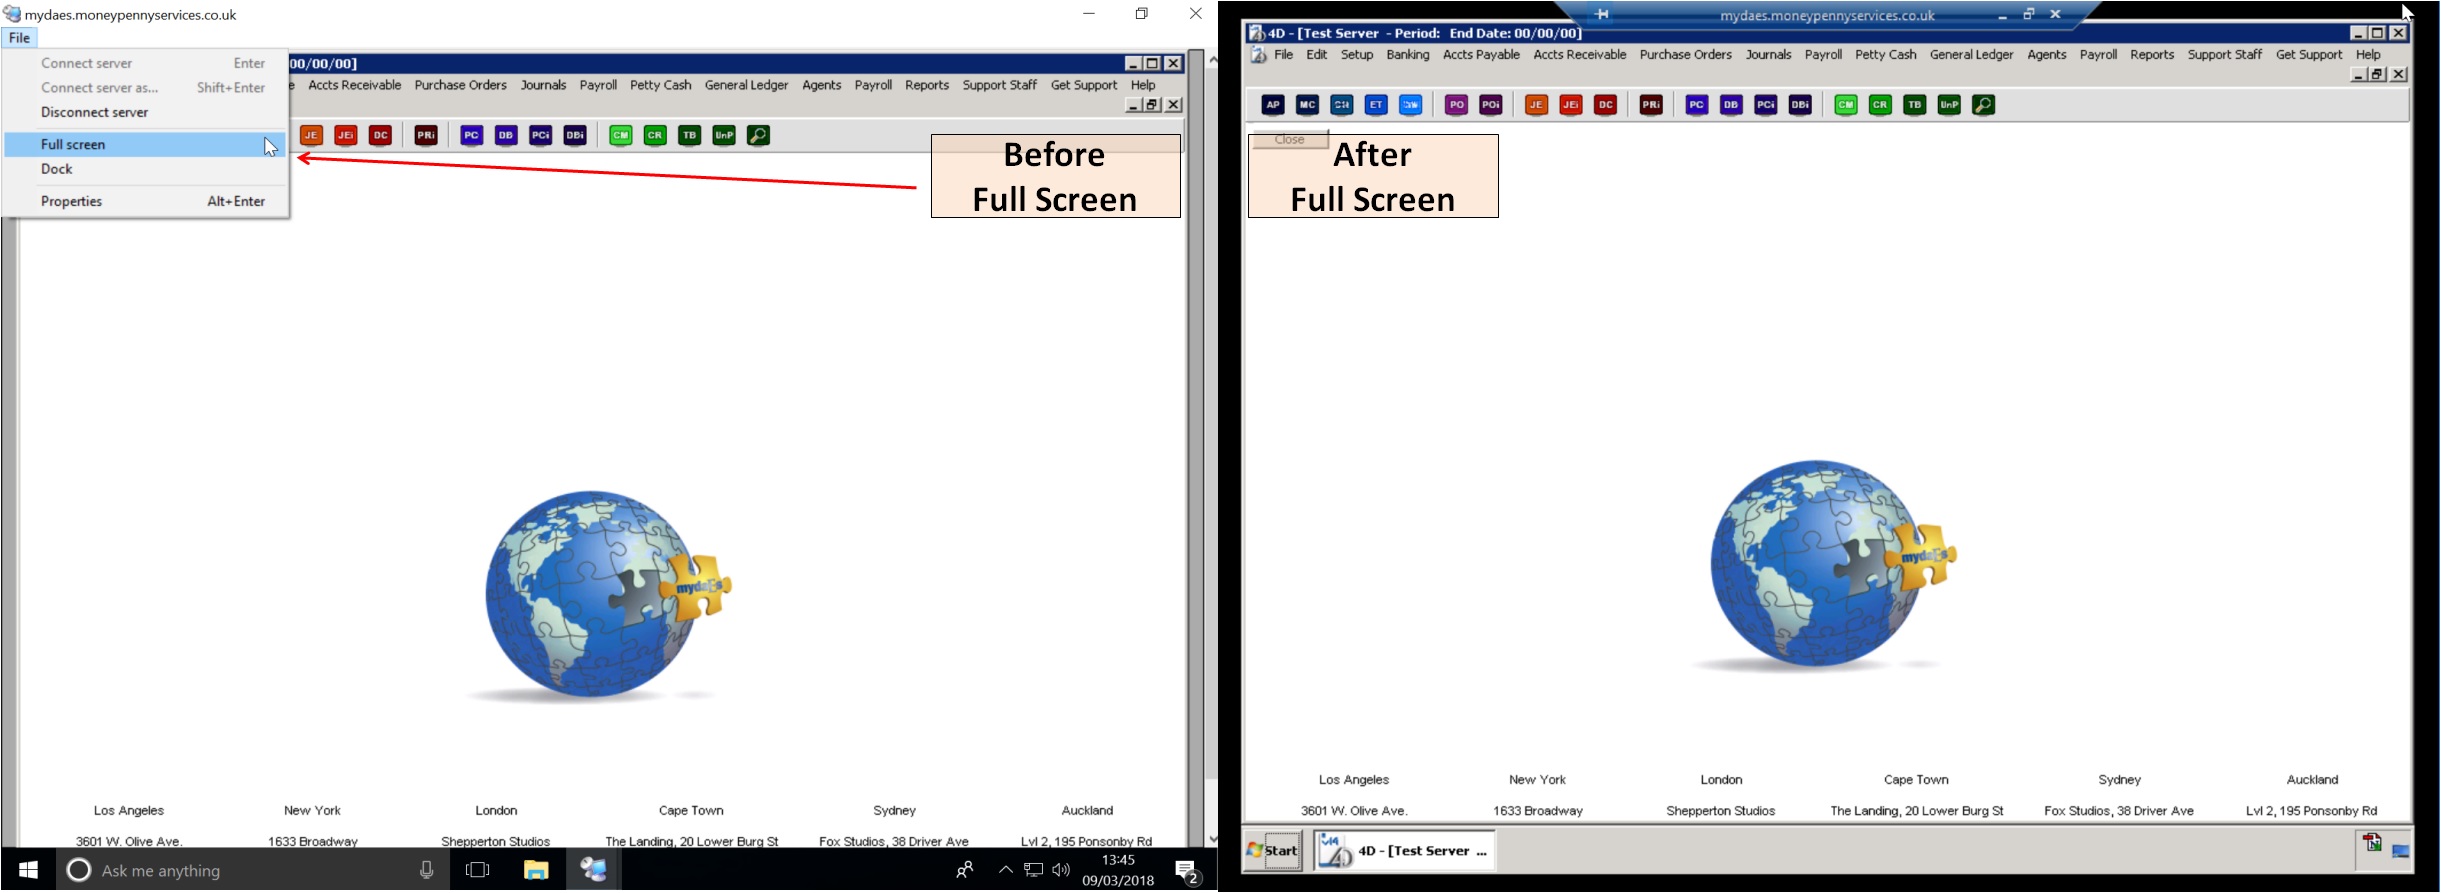
 The aim is to find a Remote Desktop Size that does not create scrollbars. Note you may wish to go to ‘File > Full Screen’ even after undocked to get the maximum amount of space that may fix the scrollbars.To make adjustments after, right-click the server name and instead choose properties. You will want to close down the existing session before doing this (X in the top right on the docked window).For example click the below image, with scrollbars before maximizing and then not after full screen. The black edges around the right option show that I could increase the Remote Desktop Size if I wanted by using the ‘Custom’ option. If there were scrollbars, I would want to lower the size accourdingly.
- Once you’re happy with your settings, close the undocked window and go to File > Save ‘shortcutname.rdg’ to ensure your changes will be available in the future. From there on, you can simply continue to use by opening Remote Desktop Connection Manager, right-clicking the server and connect undocked and go full screen.
