Purpose
This menu item is used to view or edit your budgets, and viewing estimate to complete and estimated final costs of your accounts.
Video Tutorial
If you cannot view the above video, you can watch it at Youtube at the following location.
– https://www.youtube.com/watch?v=w4UYHOWcjRg
How to use
- To view the cost manager, select ‘Cost Manager’ from the ‘General Ledger’ menu as shown below.

2. You can also open this form from the following toolbar icon.

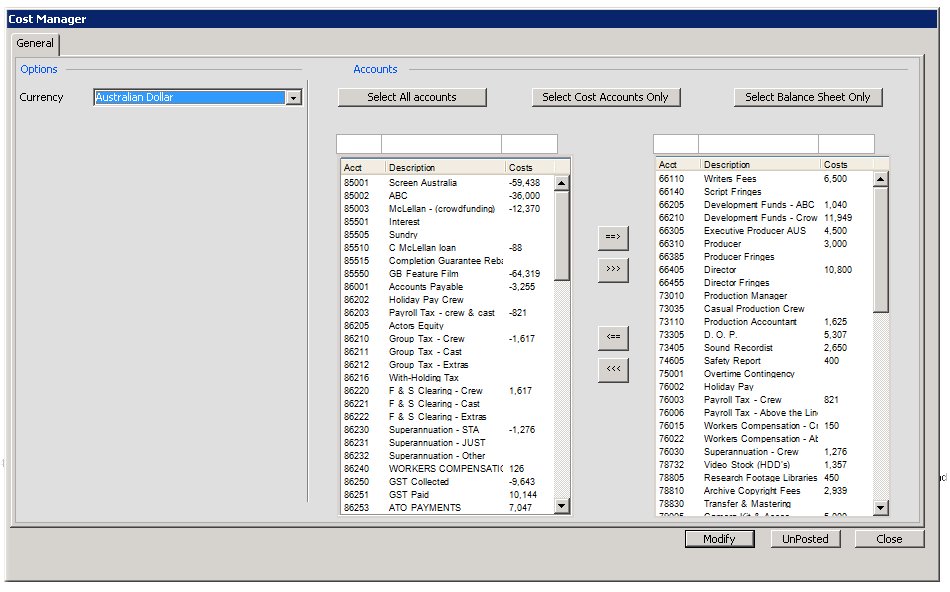
3. You will firstly be presented with the following form to choose what information to display on the cost manager.

4. The above is the simplest form of this screen, when your project is not using any locations/sets/episodes/sub accounts etc. We will discuss how this screen changes below when your project uses locations/sets/episodes/sub accounts etc.
From the above screen you can select in which currency to edit your costs, as well as choose exactly which accounts to view. You can quickly select cost accounts or balance sheet accounts only from the buttons at the top of the screen, or else select any accounts you want and move them to the right side to select them using the Arrow buttons (or arrow keys on your keyboard). As usual the white fields above the columns can be used to filter down the records underneath them to only those that match what you type in.
The un-posted button will allow you to view all currently un-posted transactions from which you can choose to post them.
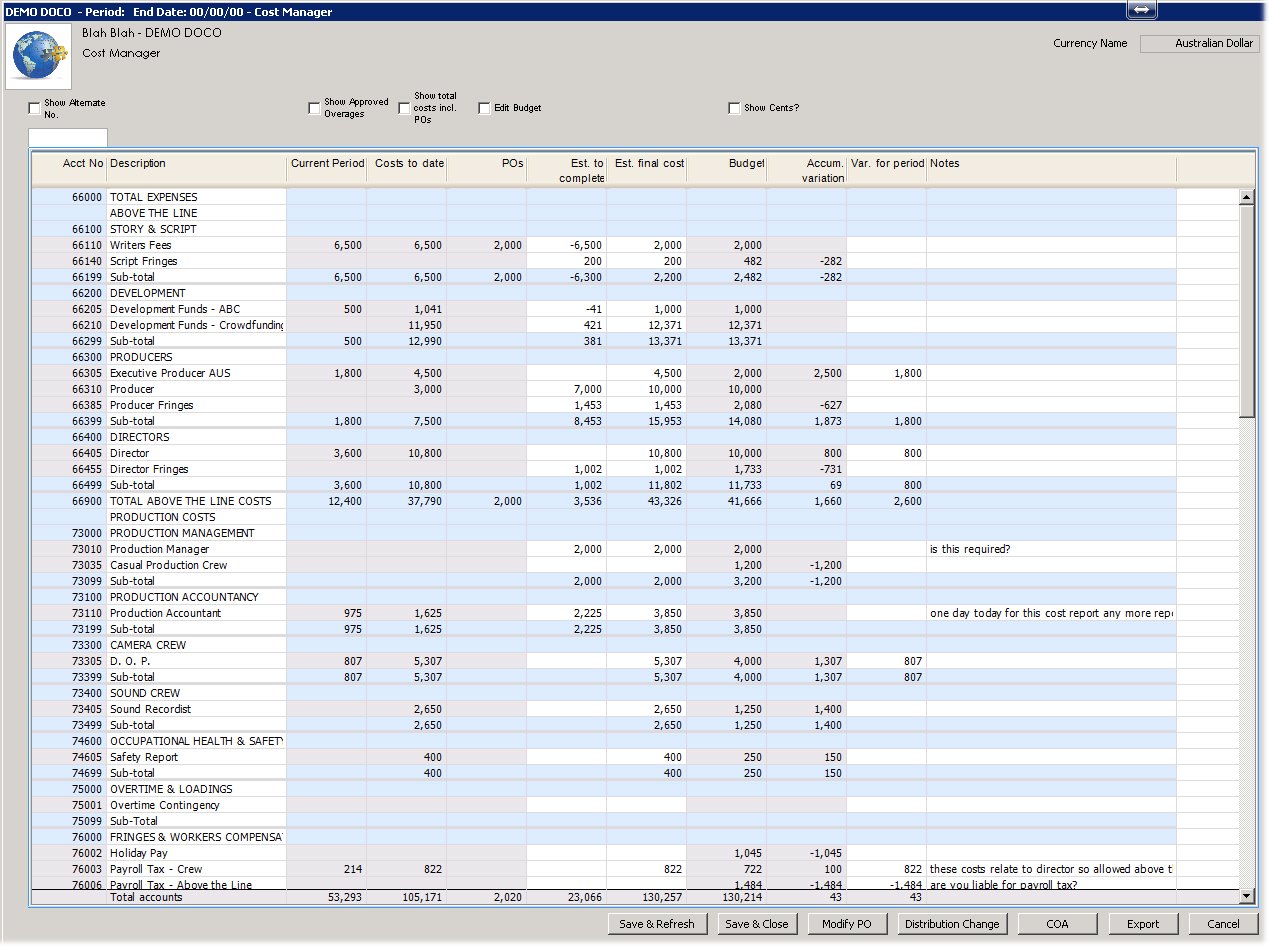
5. After you have made your selection, press the ‘Modify’ button to view the cost manager.

As usual only fields shown in white are editable. The blue fields are headers and subtotals lines, and the grey are normal accounts.
Above the grid are a number of tick boxes to change the behaviour of the fields shown in the grid. The first is called ‘Show Alternate no’ and when ticked the normal account number column will be replaced with the projects alternate chart numbers.
The ‘Show Approved Overages’ and ‘Show total costs incl. POs’ columns will display those additional columns. The ‘Edit budget’ will make the budget column editable as well as showing a new tick box called ‘Make EFC=Budget’ which when a budget change it made, the EFC will be also change to match.
The ‘Show Cents’ button will display the full values of all entries onscreen.
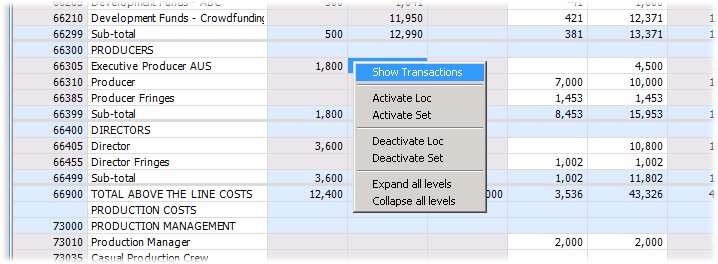
6. There are a number of additional options available when you right click a cell.

If you right click a value in the PO/Cost to Date/Current Period and Total Costs incl. POs column, and select the ‘Show Transactions’ option, mydaEs will drill down to show the transactions making up those values.

The other right click options will be discussed in more depth below under the ‘Cost manager with Locations/Sets/Sub Accounts/Episodes etc’ heading.
Cost Manager with Locations/Sets/Sub Accounts/Episodes etc
Firstly the selection screen that you see when you first run this menu item changes and contains an extra tab, to assist you in selecting exactly how to edit your costs.
