
As well as the ability to file documents against a workers Employment Record there is also the ability to store specific documents such as time sheets and invoices against an employee per payroll transaction number.
Other related filing articles
You make also review some other help articles on the filing process on Moneypenny.
How to use the Digital Filing Cabinet
Where to store the documents.
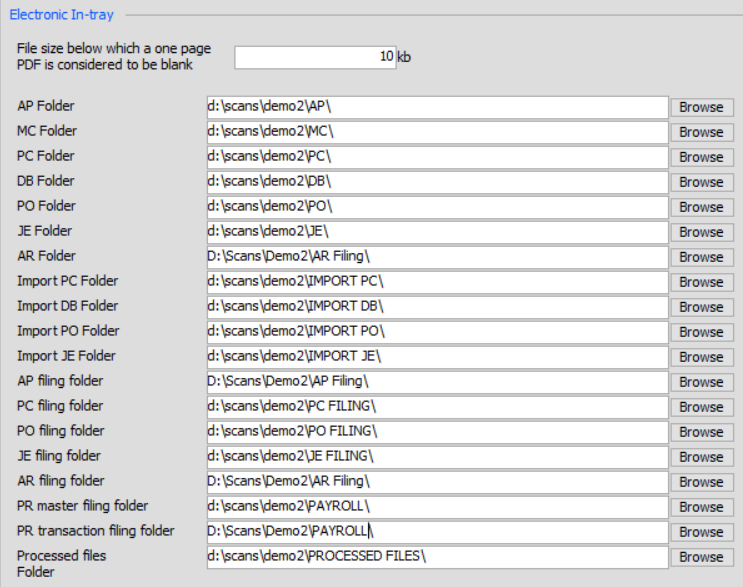
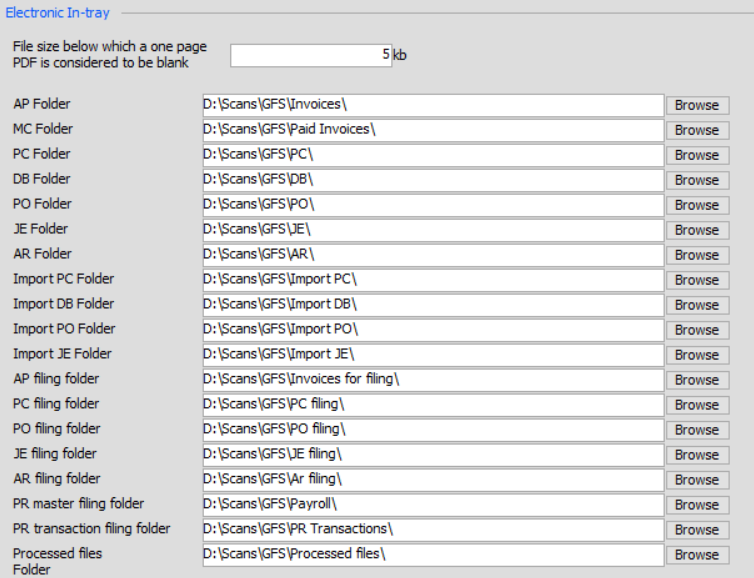
The location of the Payroll Filing in-tray can be set in the ‘Project Setup’ – please click here for more information.
In the examples below you will find the path to the folders for a project in the UK called “Demo2”, and for AUS/NZ called “GFS” – the same sort of folder structure will be present for your project.
You simply launch the SCANS folder on the Moneypenny desktop, then navigate to your project folder then open the folder that is required in which to place your payroll documents.
PLEASE NOTE: You should ensure documents are no larger than 400MB. You can use Adobe to compress your PDF. There are a number of free PDF compression tools such as PDF24.org which will allow you to upload a batch of files and compress to smaller file sizes.
UK In Tray Paths
AUS/NZ In Tray Paths
How to file documents
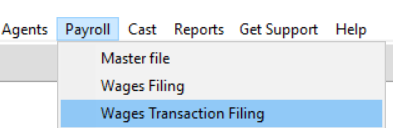
To file a large number of attachments to your payroll transaction so you can then view the documents later in the Cost Manager, for example for UK clients – select the ‘Wage Transaction Filing’ option from the ‘Payroll’ menu, for AUS and NZ clients – select the ‘Wage Transaction Filing’ option from the ‘All Employees’ menu
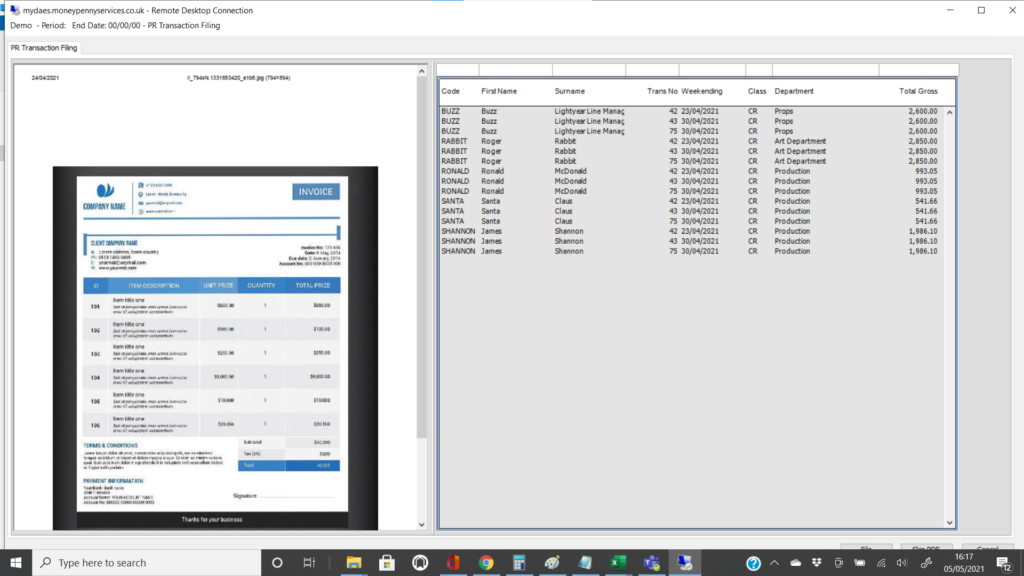
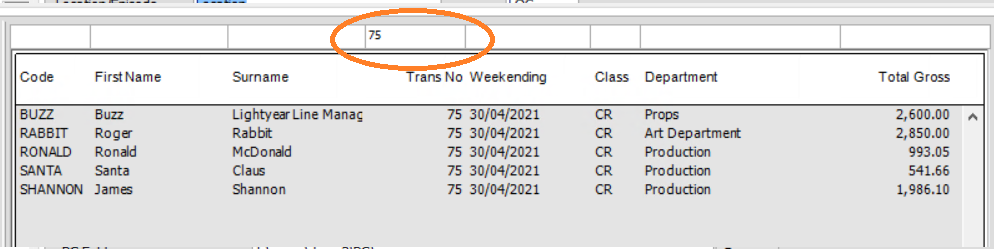
If you have any files in your Payroll Filing in-tray, the following form will be displayed. On the left hand side, you will see the first PDF in your in-tray. On the right hand side you will see a listing of all payroll entries in mydaEs, showing the Employee Code, first and last name, transaction numbers, the weekending date, department and total.
You can re-size this screen to allow for more room for the PDF or more room for your data entry, by just placing your mouse between the two sides of the screen as shown below, until your cursor changes to 2 arrows. Then just click and drag it to the left or right. Your change will be remembered the next time you open this screen.
You can also hover your mouse over the bottom of the PDF (depending on which version of Adobe you have installed on your machine) to see the Adobe toolbars that will allow you to zoom in/out and change pages etc.
Just before the PDF is displayed, mydaEs processes it to determine if the document needs to be split. If you have batch scanned multiple documents together and separated them with blank pages, mydaEs will strip out the blank pages and present you with one document at a time, which may have multiple pages (depending on where you inserted the blank pages). If mydaEs does not locate any blank pages, you will be asked whether you want to split the document into single pages or not. You will then be only shown the first page on the left hand side of the screen.
NB: If the invoice or time sheet is more than one page long for the worker then do not split. If you accidently click yes, you can delete the file in the scan folder and simply bring a fresh copy from your machine to the scans folder on the server.
The column headings are also sort buttons, which will sort the values below by that order. Above the column headings are white fields where you can enter in text and the entries below will be reduced to only show those that matched what you typed. In the example below transaction number 75 has been added to only display the lines connected to transaction 75. You can also sort on the other columns to help narrow your list.
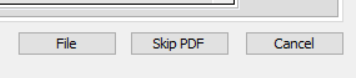
Locate the transaction that matches the PDF onscreen, highlight it and then press the ‘File’ button at the bottom of the screen. Should you not wish to process the file presented to you first, just press the ‘Skip PDF’ button to push it to the bottom of the list.
You can at any time export all the attachment through many options including when running GL reports.
This is particularly handy if you should need to produce any backup paperwork for insurance claims, using a combination of GL Codes, Free Fields, and other filters you can export documents stored.
Viewing Payroll Documents in the Cost Manager.
When you are in the Cost Manager you can right click on the following columns, Current Period/ Costs To Date/Po’s/Total Costs Inc PO’s to drill down in to transaction detail.
Any transaction which has document will have the paperclip icon as shown below.

You can click on the icon to display the document/s and open from here.

Distrubition Changes connected to Payroll
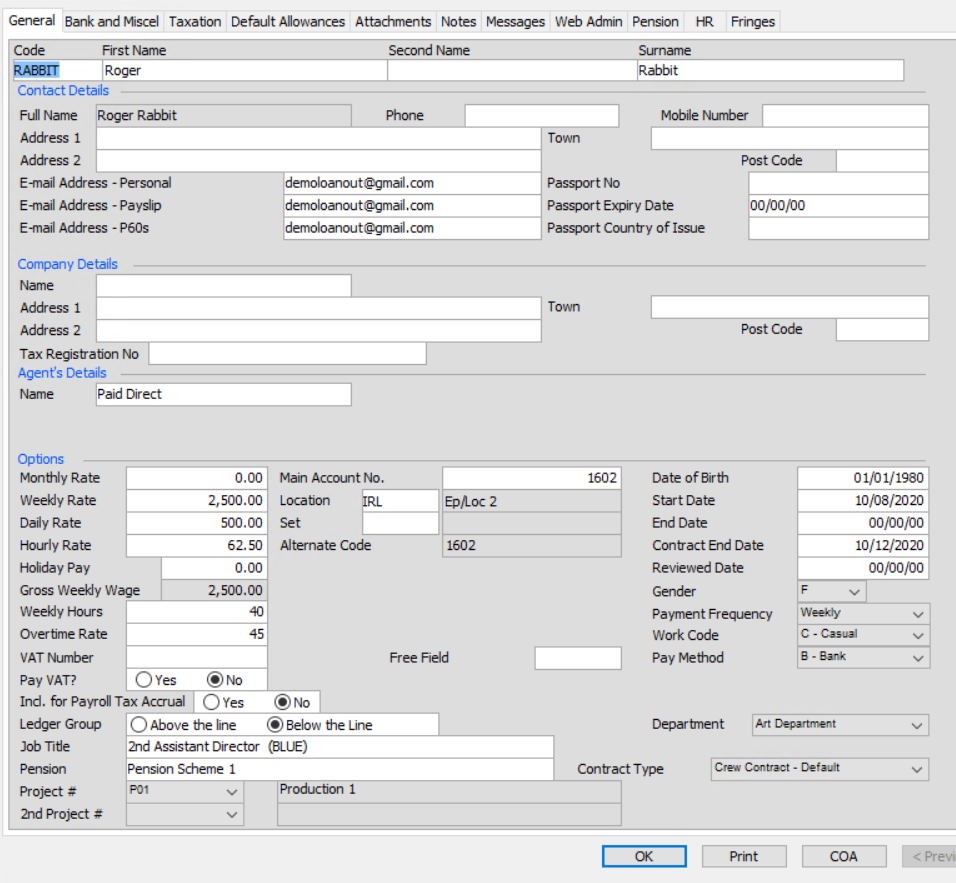
Please note some fields and screens will differ in master files depending on regions.
If you have a payroll transaction that has been coded to the incorrect place you can do a Distribution Change from within the Cost Manager and go to the master file of the employee or supplier/vendor – launch their master file, make changes.
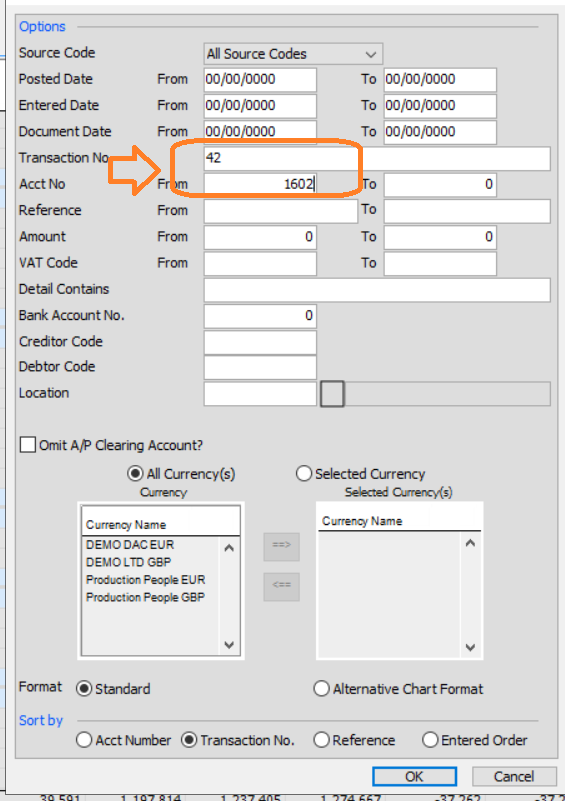
Go to Distribution Change on the bottom of the cost manager (or via Distribution Change in the Journal menu). The following form will be displayed where you can enter a selection of criteria to help find the details you need to change.

In the below example I want to find anything on transaction number 42 coded to 1602. When you click OK the fo
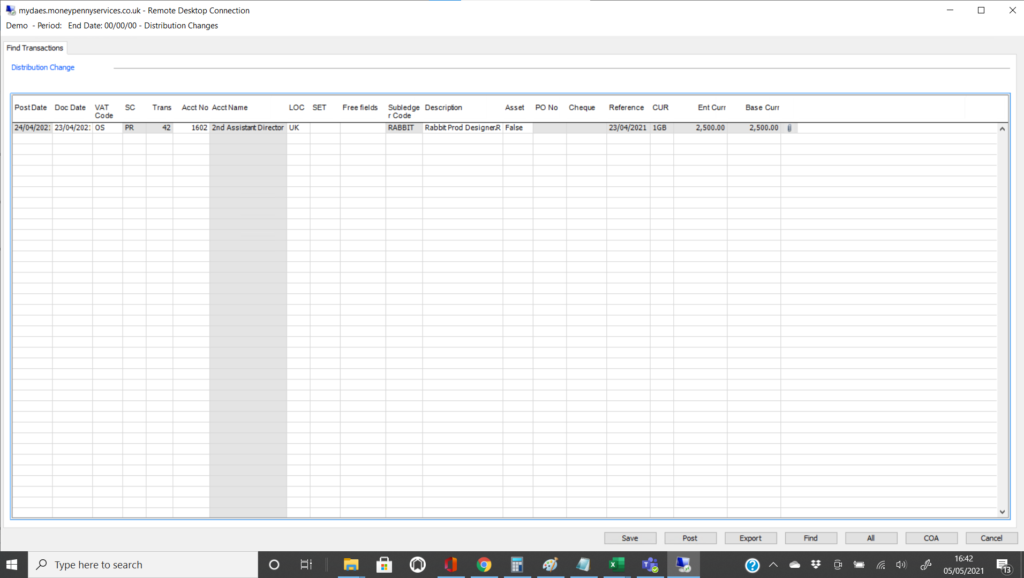
When you click OK the following form will display with your search results. (click to enlarge).
If your right click you will now be presented with the following options.
You can …
- Split the costs of the transaction over multiple lines.
- View / launch the applicable master file (supplier/vendor or crew member).
- View any documents connected to the transaction.

If you choose to launch the Masterfile, it will take you to the applicable record where you can change the GL code, save your changes, and go back to the Distribution Screen where you can also make changes if needed.
Please remember to always click save and refresh when making changes in the Cost Manager.