
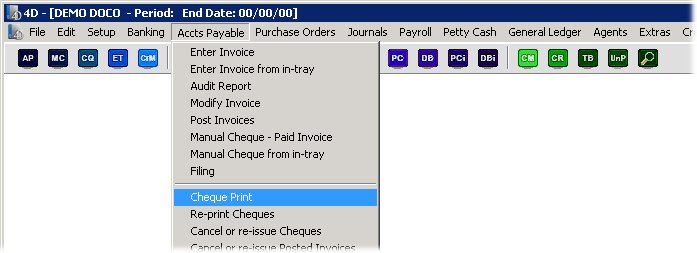
To pay your creditors/vendors by printing cheques or checks, select ‘Cheque/Check Print’ from the ‘Accounts Payable’ menu as shown below.
You will then be presented with the following form.
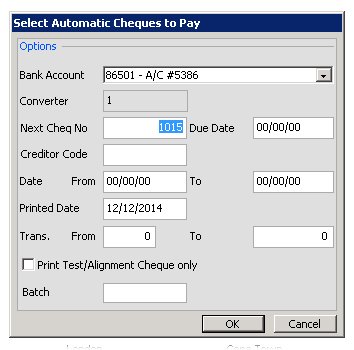
From here you can filter down to select certain invoices only for payment ie by creditor code/date range or transaction range. You can also select a due date and then only those invoices with a due date before the date entered, or with an empty due date will be shown for payment. The next cheque/check number can be entered here as well to match up with your pre-printed cheque/check stocks numbering.
You can also select the correct bank account to pay the funds from.
There is also a test option above ‘Print Text/Alignment Cheque/Check Only’, so that at the start of a project, you can print multiple test cheques/checks with the money blanked out, to confirm that alignment of the detail on your pre-printed stock is optimal.
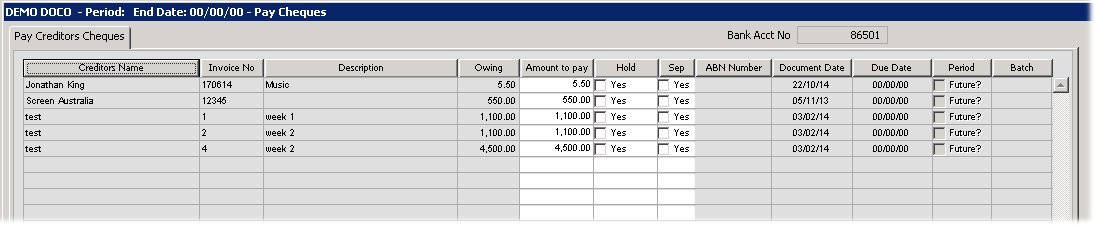
Once you have made your selection (or just selected OK to view all outstanding invoices), the invoices awaiting payment by cheque/check will be shown.
Please click on the image to view it full screen, then the back button to return.
From here you can choose to tick either the ‘Hold’ or ‘Sep’ (Separate Cheque/Check) columns.
If you tick Separate Cheque/Check, if more than invoice is to be paid for the same creditor/vendor, then each will be paid on a separate cheque/check. You can also enter in ‘Separate cheque/check’ when you are entering the invoice originally and it will flow through to this screen.
If you wish to stop some invoices from being paid today, you can press the ‘Hold’ button before you press the ‘Print’ button at the bottom to continue with the rest of the cheque/check printing. You can also enter in ‘Hold cheque/check’ when you are originally entering the invoice and it will flow through to this screen. Please note there is also a ‘Hold All’/’Hold None’ button at the bottom of the screen if you wish to make all the invoices held or not.
Please note this screen will only show posted invoices, unless of course during setup of your project, you requested un-posted invoices can be paid from Moneypenny support.
You can also choose to alter the Amount to pay by reducing the amount of money shown in the ‘Amount to pay’ column.
Once you have completed your changes, select the ‘Print’ button to proceed with the printing of the cheques/checks.
You will next be alerted as to how many cheques/checks are about to be printed so that you can load your pre-printed cheque/check stock into the printer.
NB We have many formats you can choose from that will be suitable for your country/bank. These can be selected in the ‘Setup’ – ‘Bank Accounts’ screen in the field entitled ‘Default Cheque/Check Format’. You can also choose how many copies of the cheque/check to print from here as well in the ‘No. of Cheques/Checks to print’ field.
After the cheques/checks have all printed, the following form will be presented.
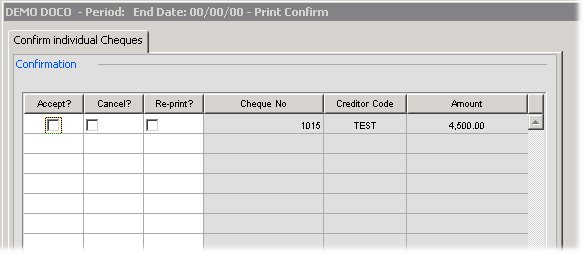
From here you can specify whether individual cheques/checks were successful, need to be cancelled or re-printed if they failed in the printer.