
From many places within Moneypenny you can enter in a creditor/vendor code, to select which creditor or vendor applies to that transaction etc. All of these fields behave in the same way. ie you can type in the whole creditor/vendor code you wish to use, should you know it, or else you can partially type in the code to look-up which codes match what you have typed. You can also type in something like ? (or any text that doesn’t match one of your codes, to being up all creditors/vendors to choose from).
So using the ‘Enter Journals’ screen as an example, in the ‘Creditor’ field you can type in a whole creditor code. Please note depending on where in the world you are using mydaEs from, this field will be called ‘Vendor’.
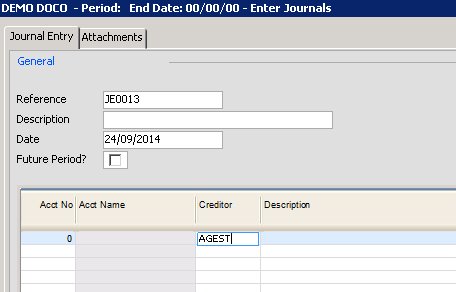
When you leave the field now, by either the mouse or tabbing past it, you would move straight into the next field.
If you enter in part of the creditor/vendor code, say a ?, and then leave the field, you would be directed to the lookup screen as shown below. In this example below I entered in only an ‘a’ before leaving the field. I am therefore shown only a list of my creditors/vendors that start with the letter ‘a’. Any amount of characters could be typed in of course, if I entered in ‘AD’ only ‘ADAMWI’ and ‘ADELAI’ would have been shown onscreen.
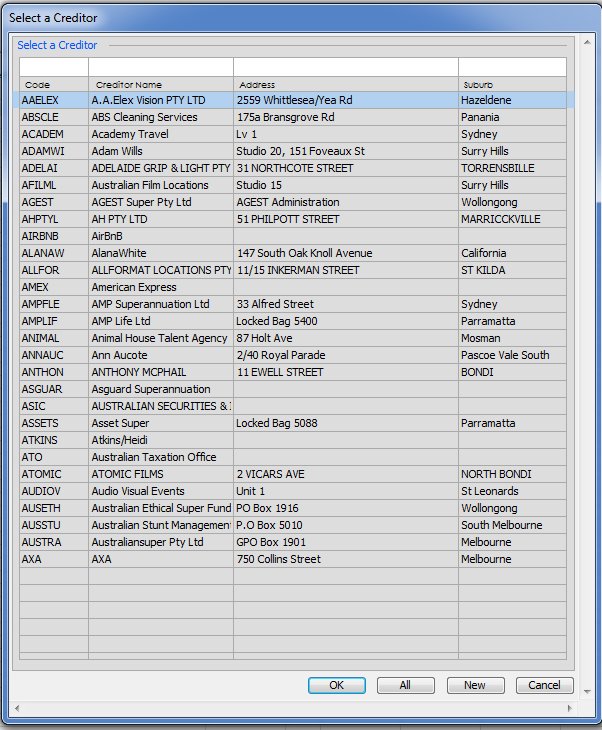
From this screen you can type in numbers or text in the white fields above each column to further filter down your entries. You can also press the ‘All’ button at the bottom to display all records or else press ‘New’ button to add in a new creditor/vendor.
For more information on how to add in a new creditor/vendor, please see the ‘Creditors Master file’ entry.
Once you save after entering in all details for that creditor/vendor, you will be directed back to the page you originally came from and the new code will be populated.