
How to open the creditors/vendors master file
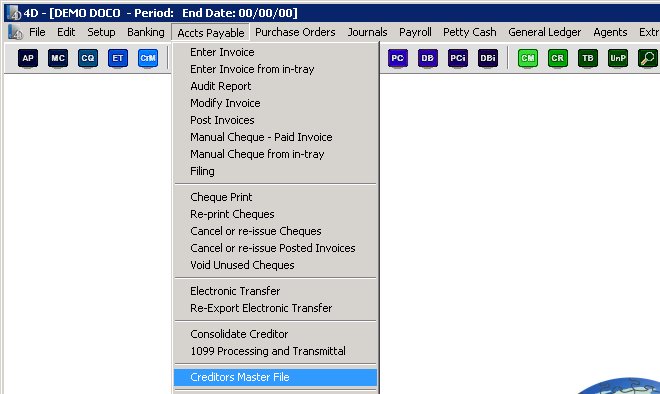
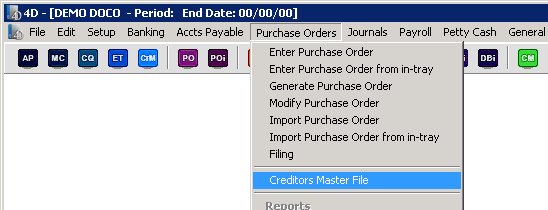
This form can be opened from multiple places from within Moneypenny it is available on 3 separate menus as below.

It can also be accessed by the toolbar button as shown below.

On top of this, during data entry on multiple screens such as entering/modifying invoices or manual checks/cheques, you will see a button at the bottom entitled ‘Creditor’/’Vendor’. This will also take you straight to editing the master file record for this creditor/vendor.
How to use the creditors/vendors master file
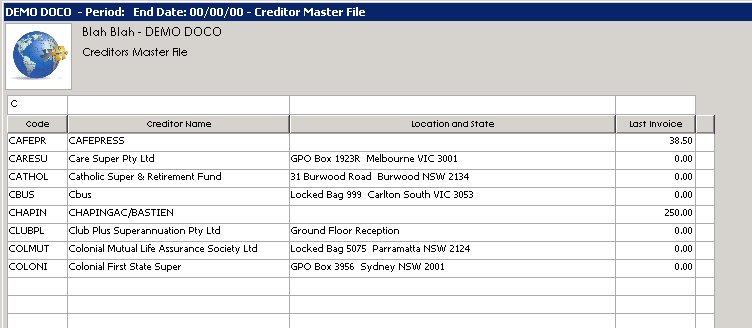
The first screen that will display will show a listing of all of your creditors/vendors in mydaEs as shown below.
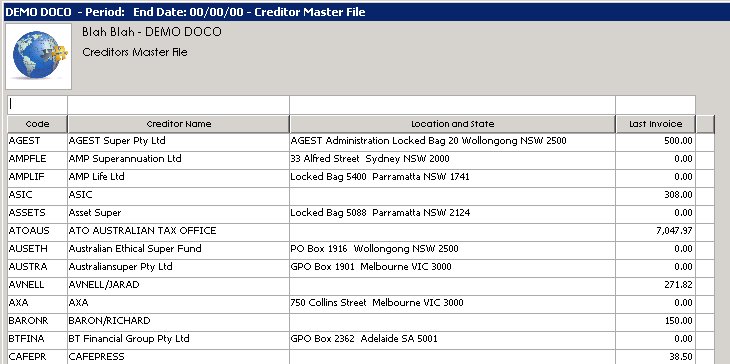
As usual, the column titles are buttons that can be used to sort those columns. We also have the white fields above each column where you can start typing in any text, and the entries below will reduce to display only those that matched what you typed.
At the bottom of this screen you can choose to ‘Delete’ a particular creditor/vendor if they have not yet been used on a transaction, add a new creditor/vendor, ‘modify’ and existing creditor/vendor or choose to ‘Export all attachments’ that have been previously added to mydaEs for the creditor/vendor as a whole.
How to modify a creditor/vendor
You can modify a creditor/vendor by either double clicking that row, or else selecting it and then pressing the ‘modify’ button.
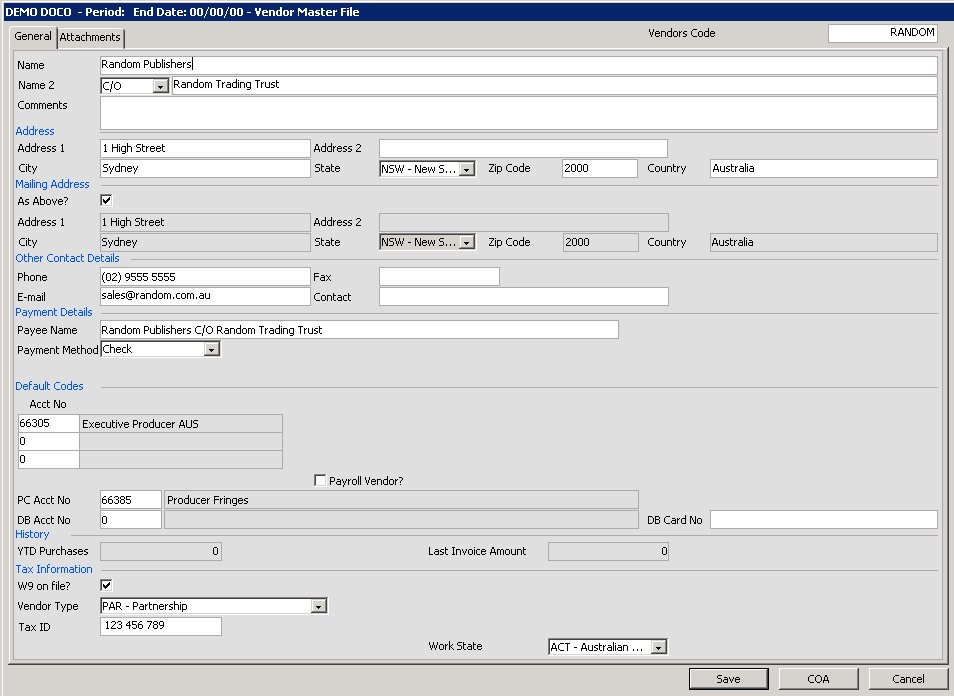
You will then see the following form. It is important to state here, that if you are using Moneypenny from different countries this form will look slightly different depending on your countries requirements.
For Australia it would look as follows.

Please click on the image to view it full screen, then the back button to return.
For the United States, it would look as follows.
Please click on the image to view it full screen, then the back button to return.
You will notice at the bottom, the USA specific fields to select the vendor type/Tax ID/Work State and to select whether the W9 is on file or not.
At the top of this form, we can see some generic contact and address details, your wording may change of course if in your country you have no post codes, or you instead have provinces etc.
In the payment details section you can enter in the creditor/vendors payee name as well as their payment method ie check/cheque vs electronic transfer. In which case the bank details will need to be entered either BSB/Account No,Sort Code/Account Number or BIC and IBAN can be entered (for the European SEPA standard).
You can select up to 3 default account codes, which will automatically come up on new invoices to save a little data entry for you.
You can select whether this creditor/vendor is a payroll vendor when wages transactions are imported from third party wages applications. The importing would then create an invoice for payment.
You can choose a default free field (if you are using free fields on this project) which will default this value in each time this creditor/vendor is used.
You can enter in the petty cash account numbers (or debit card, plus the card number itself) for use with the petty cash module.
At the bottom of this screen you can choose to save your changes or look-up the COA. For more information on the COA lookup please click here.
How to add a new creditor/vendor
To add in a new creditor/vendor, just press the ‘New’ button from the bottom of this screen.

You will then be shown a blank form as follows.
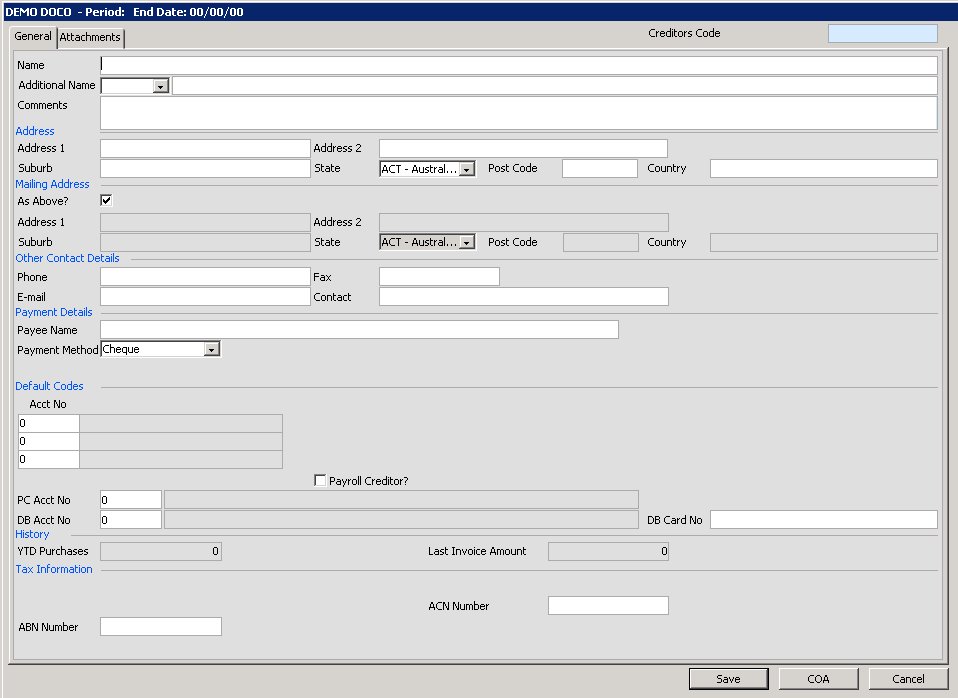
Please click on the image to view it full screen, then the back button to return.
You can then enter in all the required fields which were explained in more detail above. Please note the creditors/vendors code will be automatically assigned when you enter in the name of the creditor/vendor to use its first 6 characters. You can of course change this to a different code that you prefer.