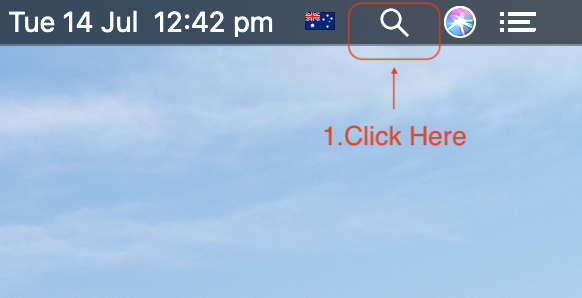
1.Click on Magnifier on top-right corner.
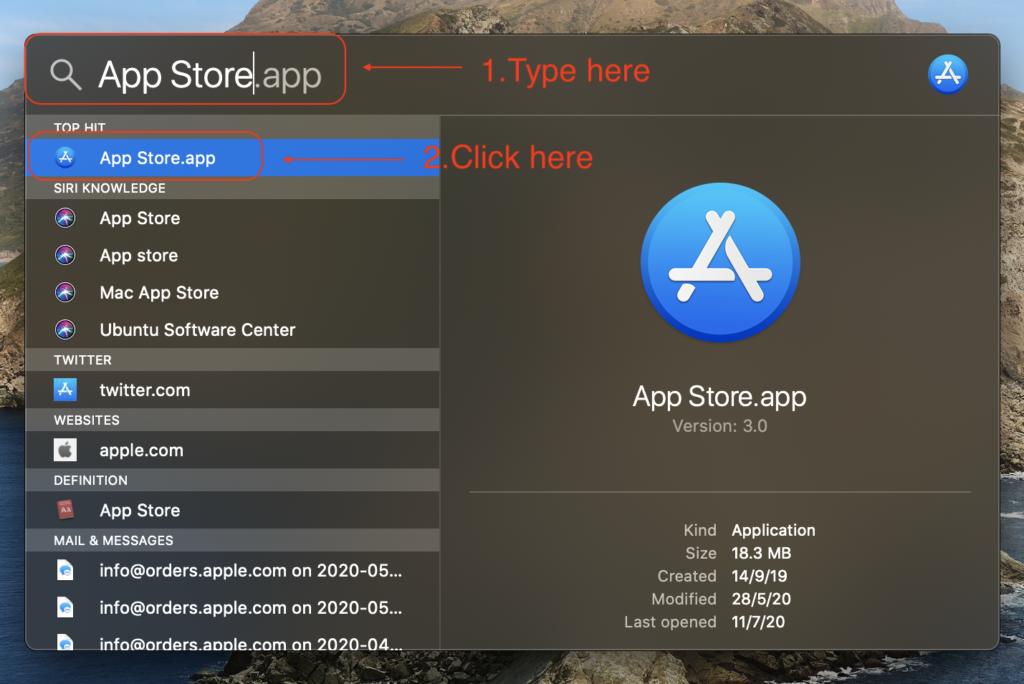
2.On the search bar type App Store
3.Select the first result (App Store.app)
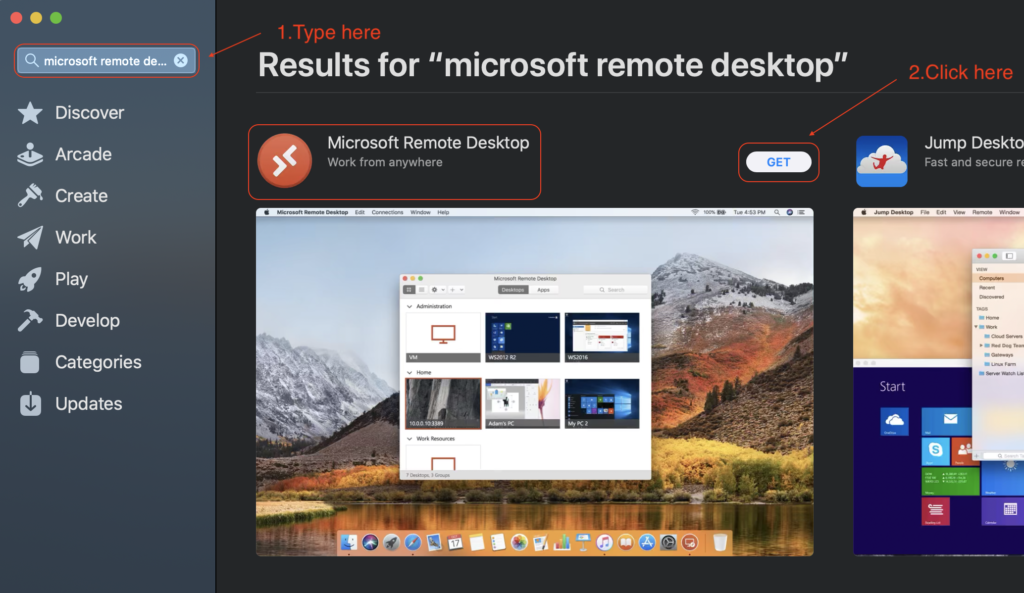
4.Search for Microsoft Remote Desktop in the search field of App Store
5.Find Microsoft Remote Desktop and Click on get. It might ask for password of your iCloud/Apple ID.
6.If you already have this application installed, you will see the open button instead of GET. Just close the App Store.
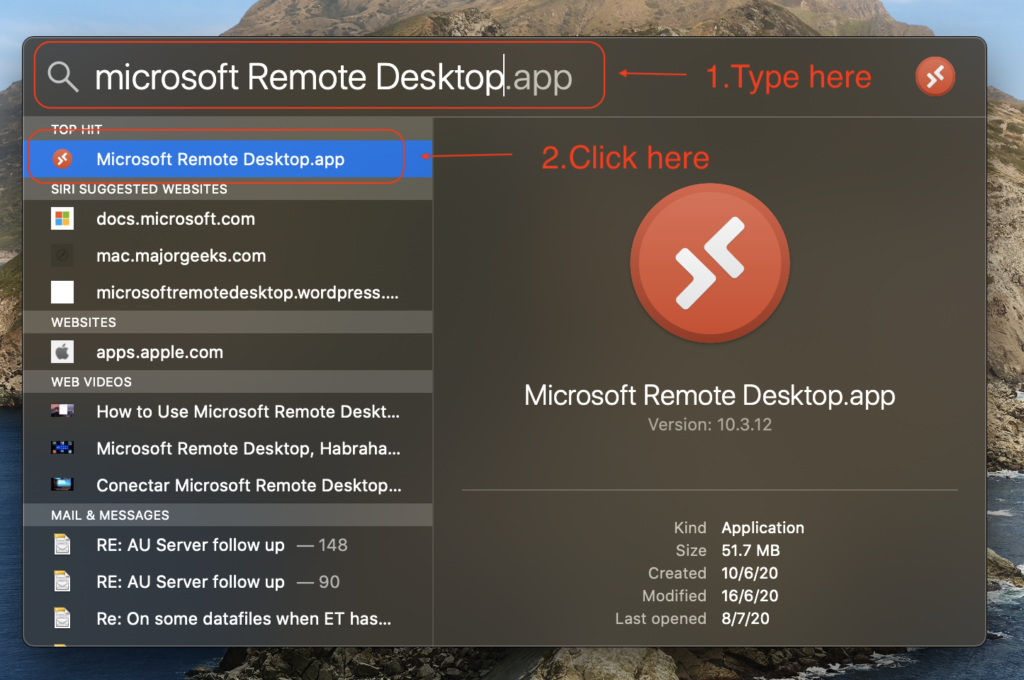
7.Click on Magnifier on top-right corner again.
8.On the search bar type Microsoft Remote Desktop
9.Select the first result (Microsoft Remote Desktop.app)
10.Following application will open up.

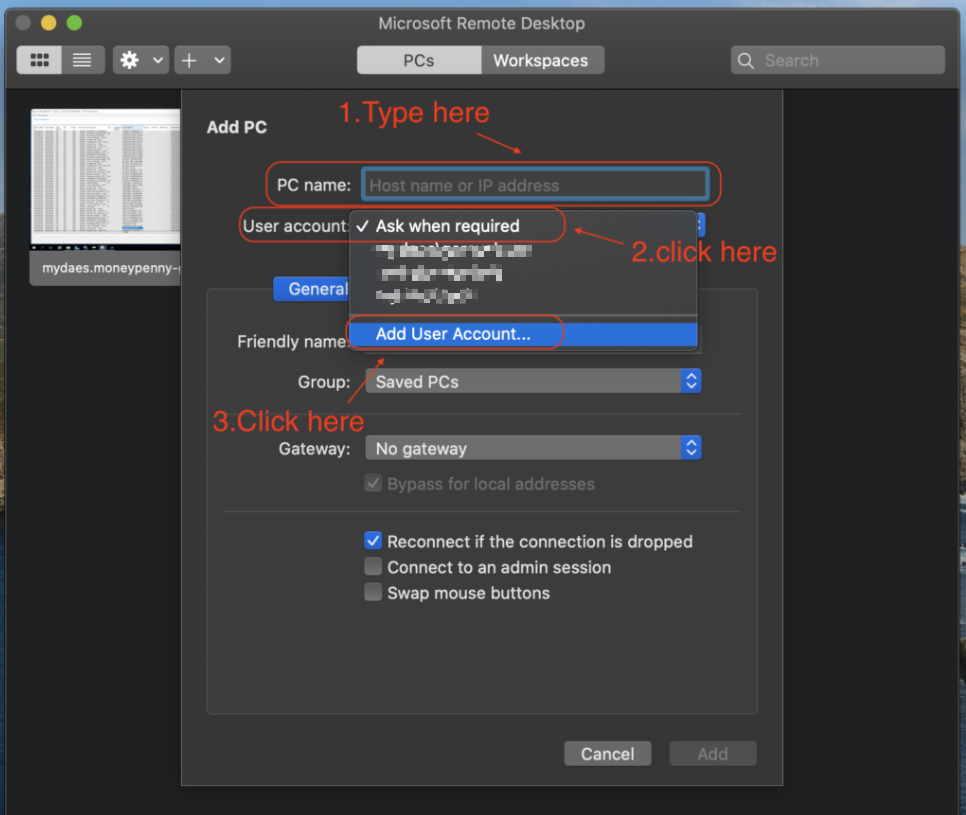
11.Click on +
12.Select Add PC

13.If you are connecting to Australian server enter aus.mydaes.online in PC name and for New Zealand server enter epnz.mydaes.online
14.Click on Ask When required drop-down menu
15.Select Add User Account
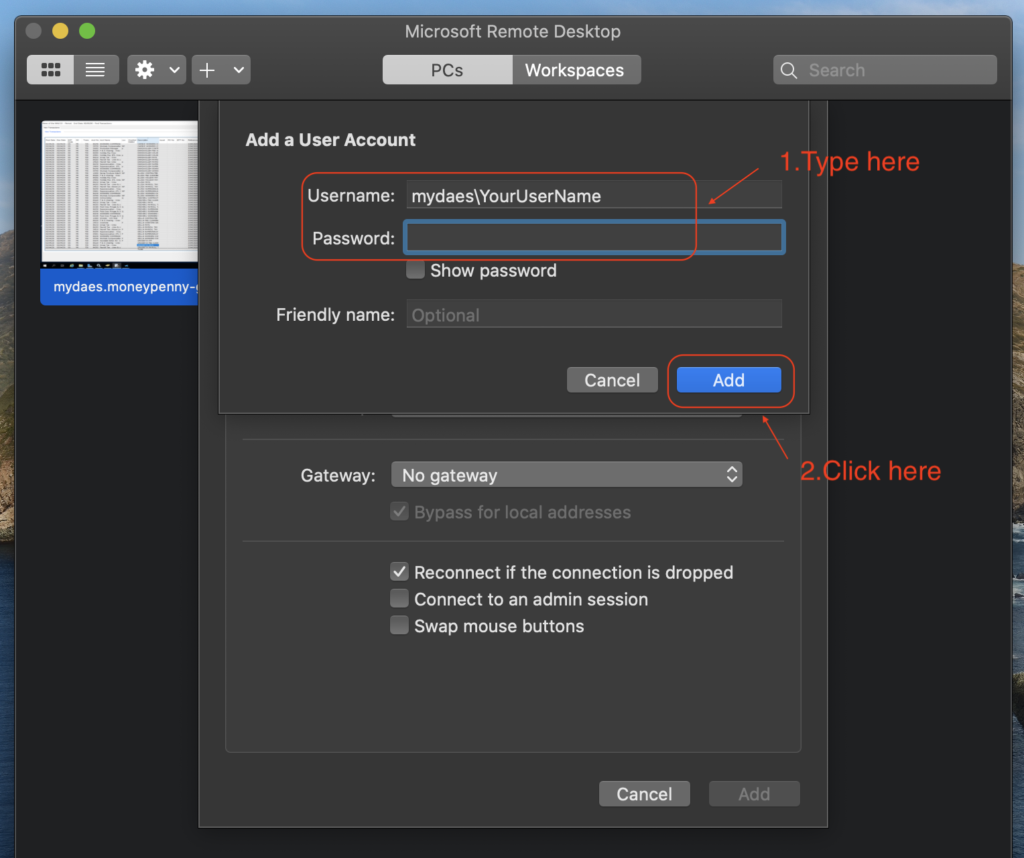
16.Enter your username and password here. make sure to add mydaes\ before your username
17.Click on add
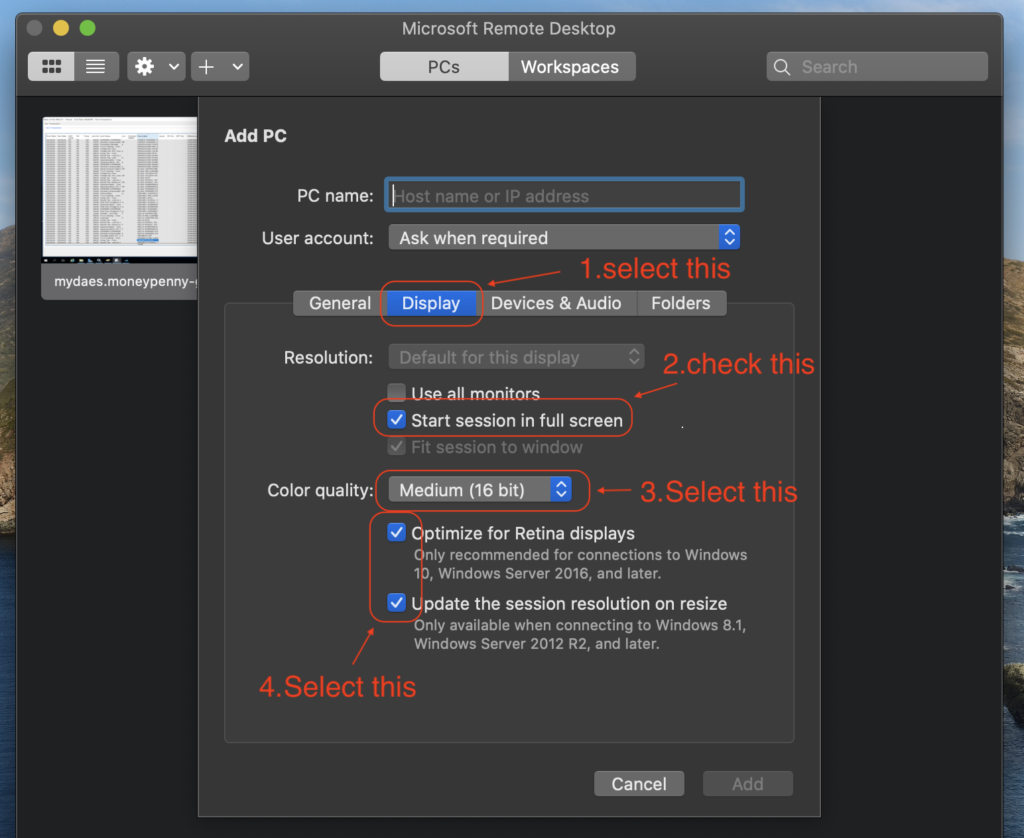
18.Choose the Display tab
19.Check box of Start session in full screen
20.Select Medium (16 Bit) for Color Quality
21.Make sure you check last two options
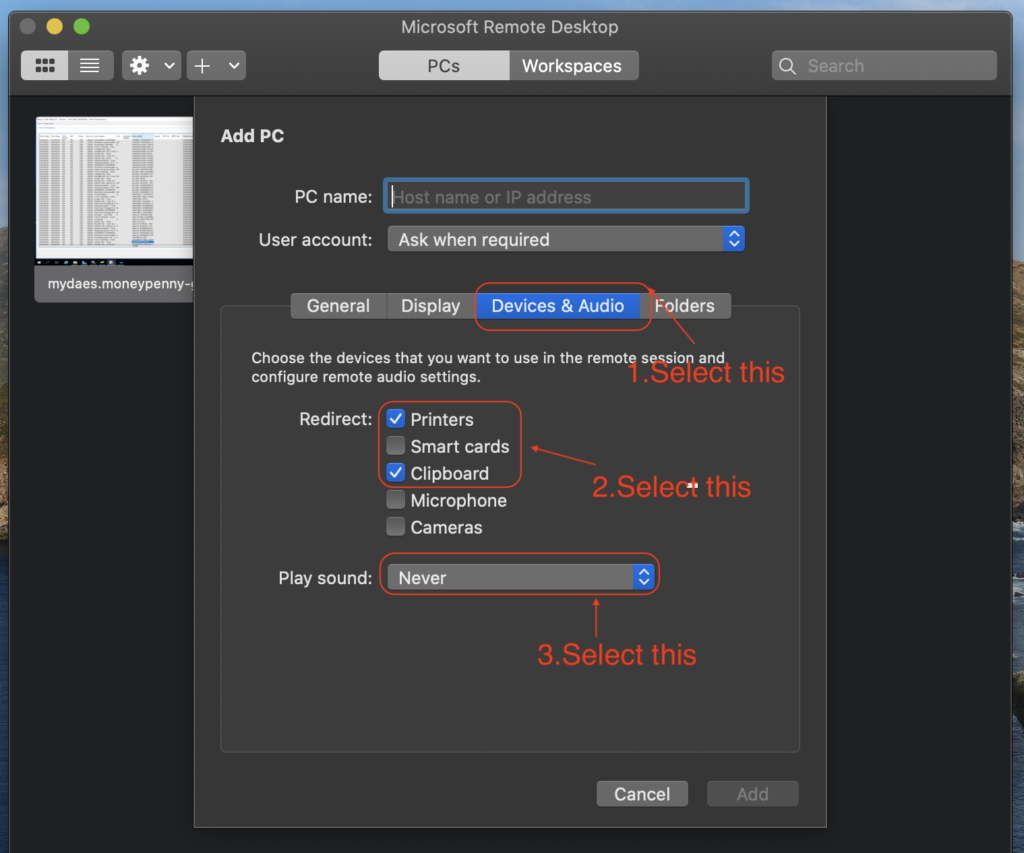
22.Choose the Devices & Audio tab
23.Check Printers and Clipboard
24.Select Never for Play sound
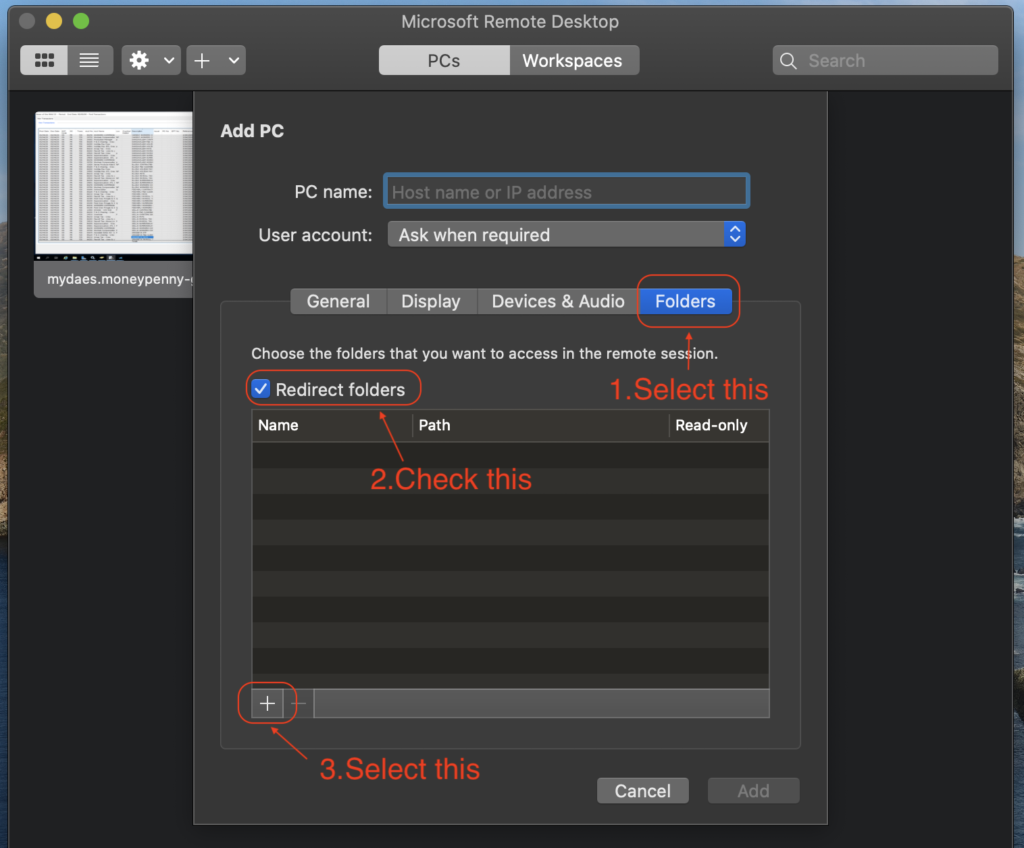
25.Choose the Folders tab
26.Check Redirect Folders box
27.Click on +
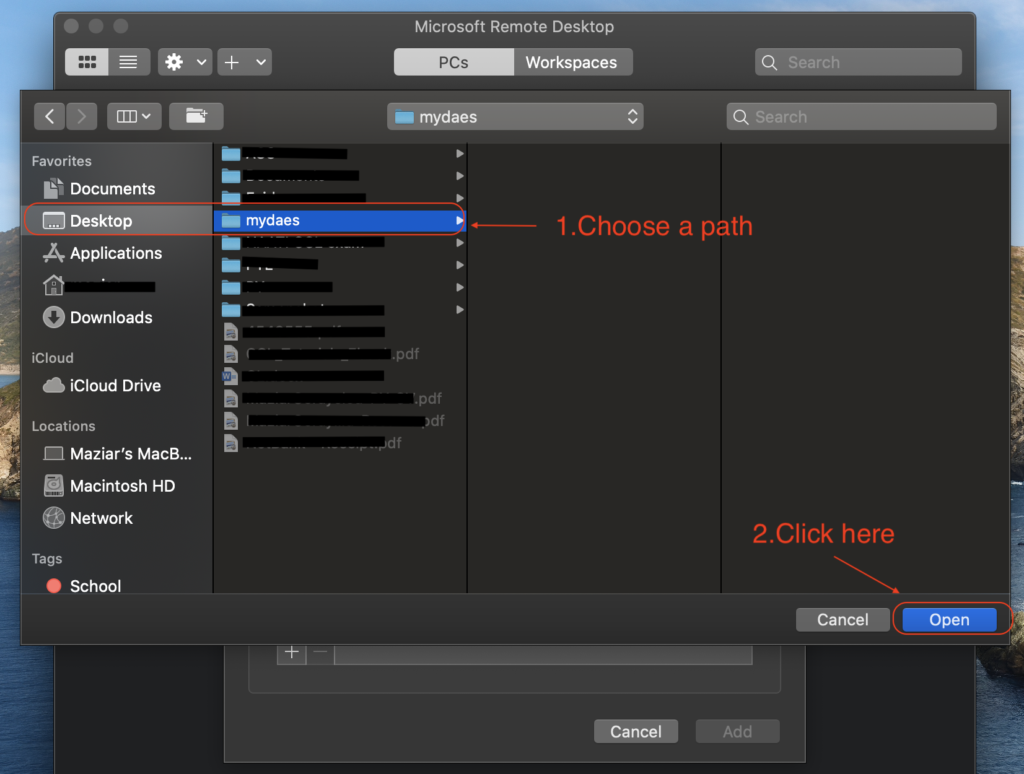
28.Select the path to the folder you want to share. (Create a folder for mydaes on your desktop beforehand)
2.Click on Open
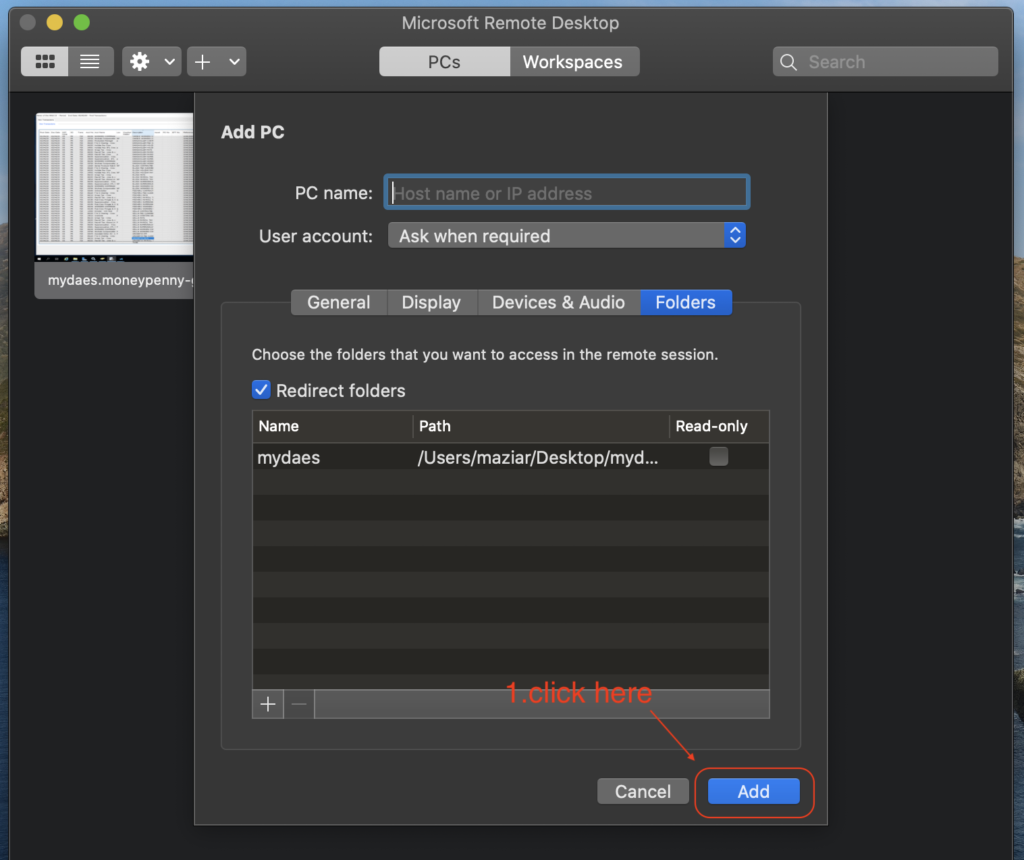
29.Click on Add
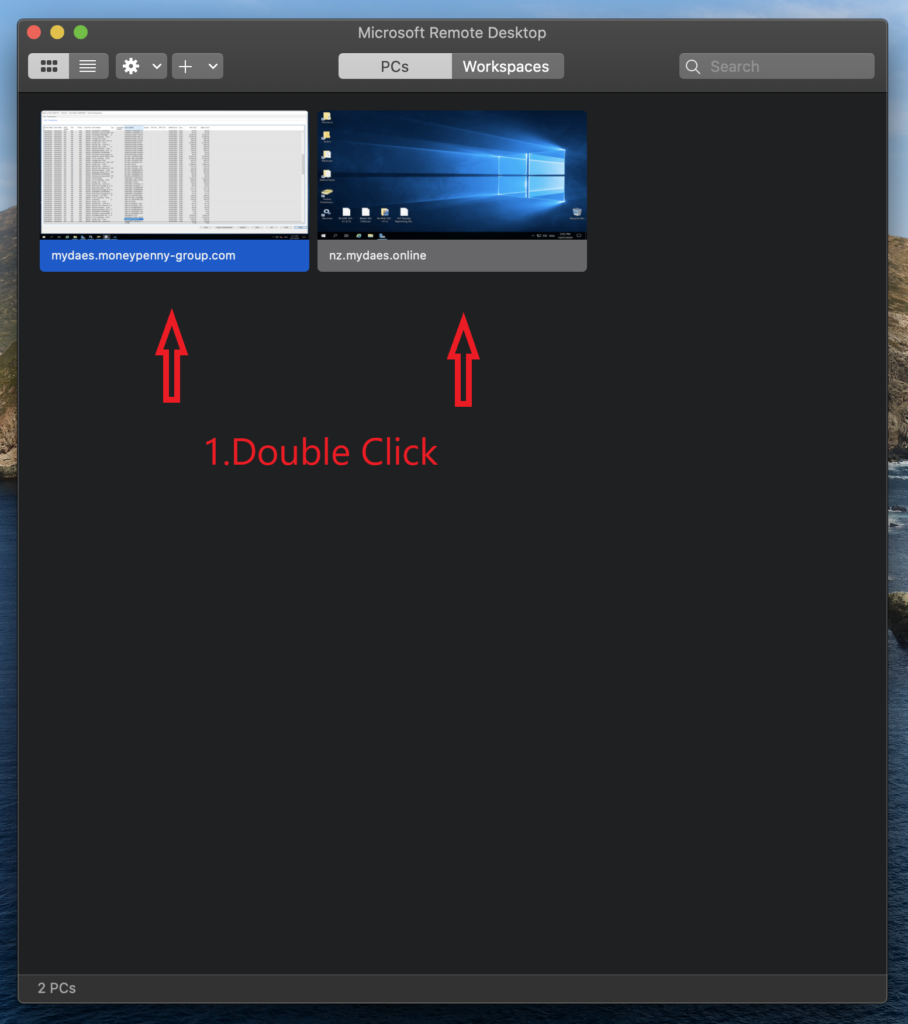
30.Double Click on available option