
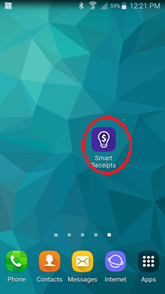
- The crew member will need to download the Smart Receipts App and install on their smart phone. The icon looks as follows
When the app is open for the first time, you will see the following message.
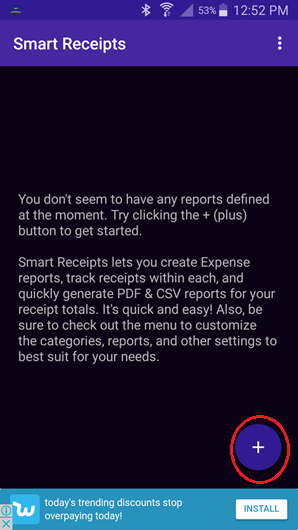
Click on the + (plus) button to create a new Expense Report. These expense reports could be a weekly or daily report depending on how often you lodged with the Production Accountant
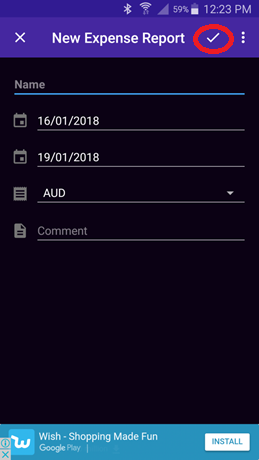
Enter the name for the expense report, the start and end dates and what the currency is and this click the tick button at the top.
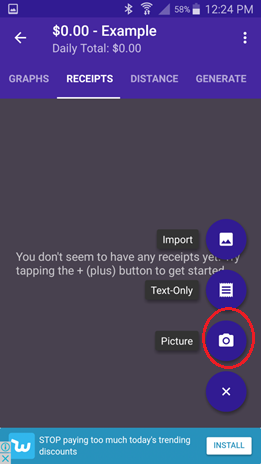
You are now ready to enter in receipts.
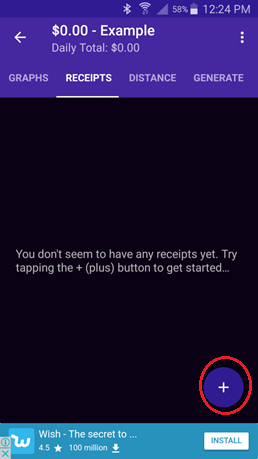
Click on the + button and then select Image/Picture
Take a photo of the receipt and if you are happy with the results click OK
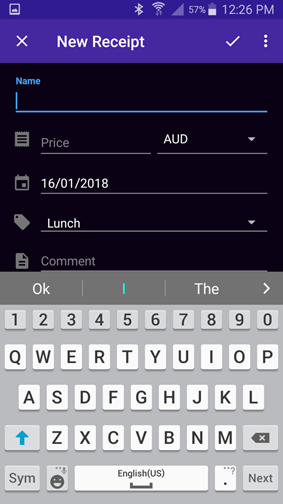
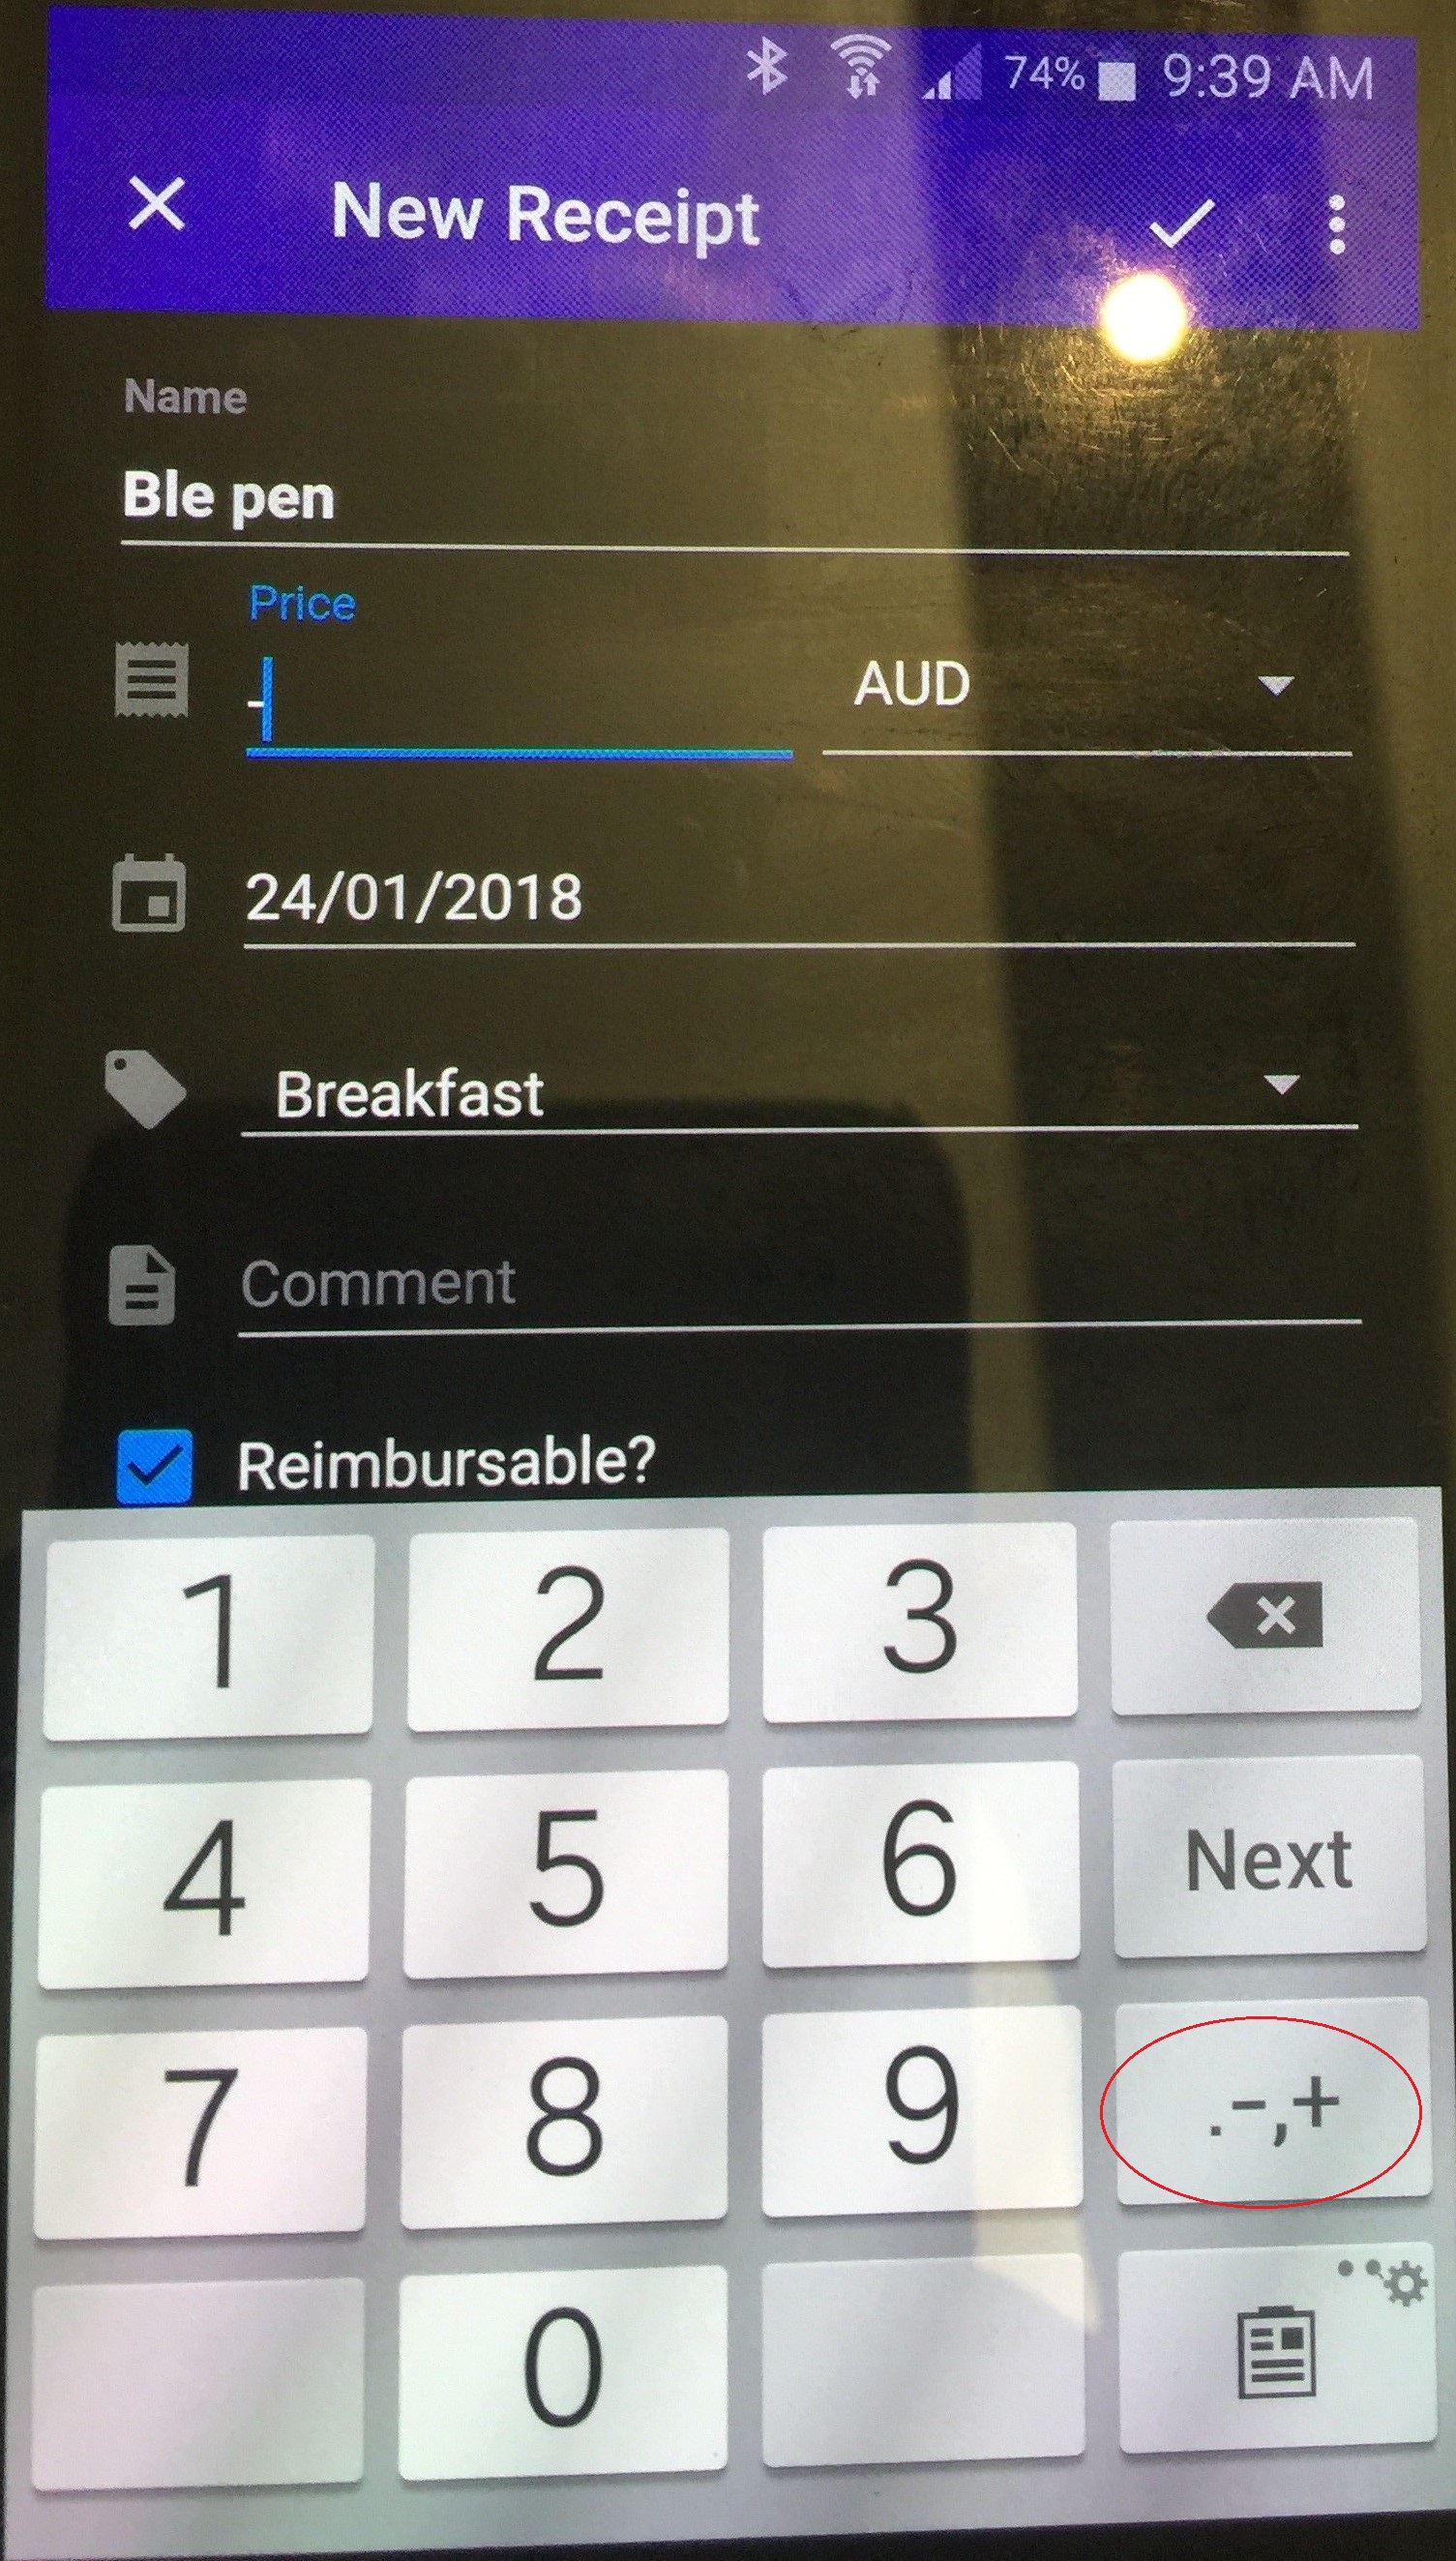
You can now enter in the details of the receipt.
Name – the item which you purchase as much detail as possible
Price – how much it cost (including GST where applicable)
Date – the date purchased
Category – this is not use in Moneypenny so can leave as whatever it automatically selects
Comment – please enter the name of the supplier/store the item(s) was purchased from
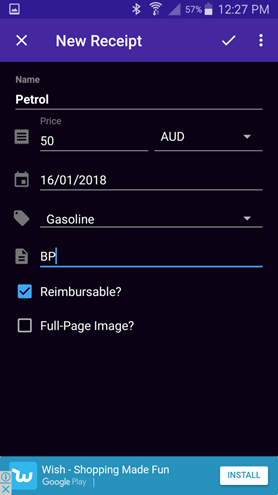
For example….
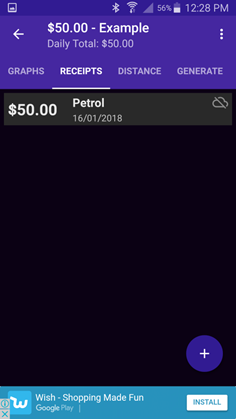
Once details are enter, click the tick button and the record will be saved. A list of all receipts lodged on the expense report will appear.
If you need to enter a negative receipt (i.e. a refund for a return item) then when you go to enter in the price, to enter a negative sign just click on the button “, – , +” (indicated below) twice for the “-” to appear in the price field.
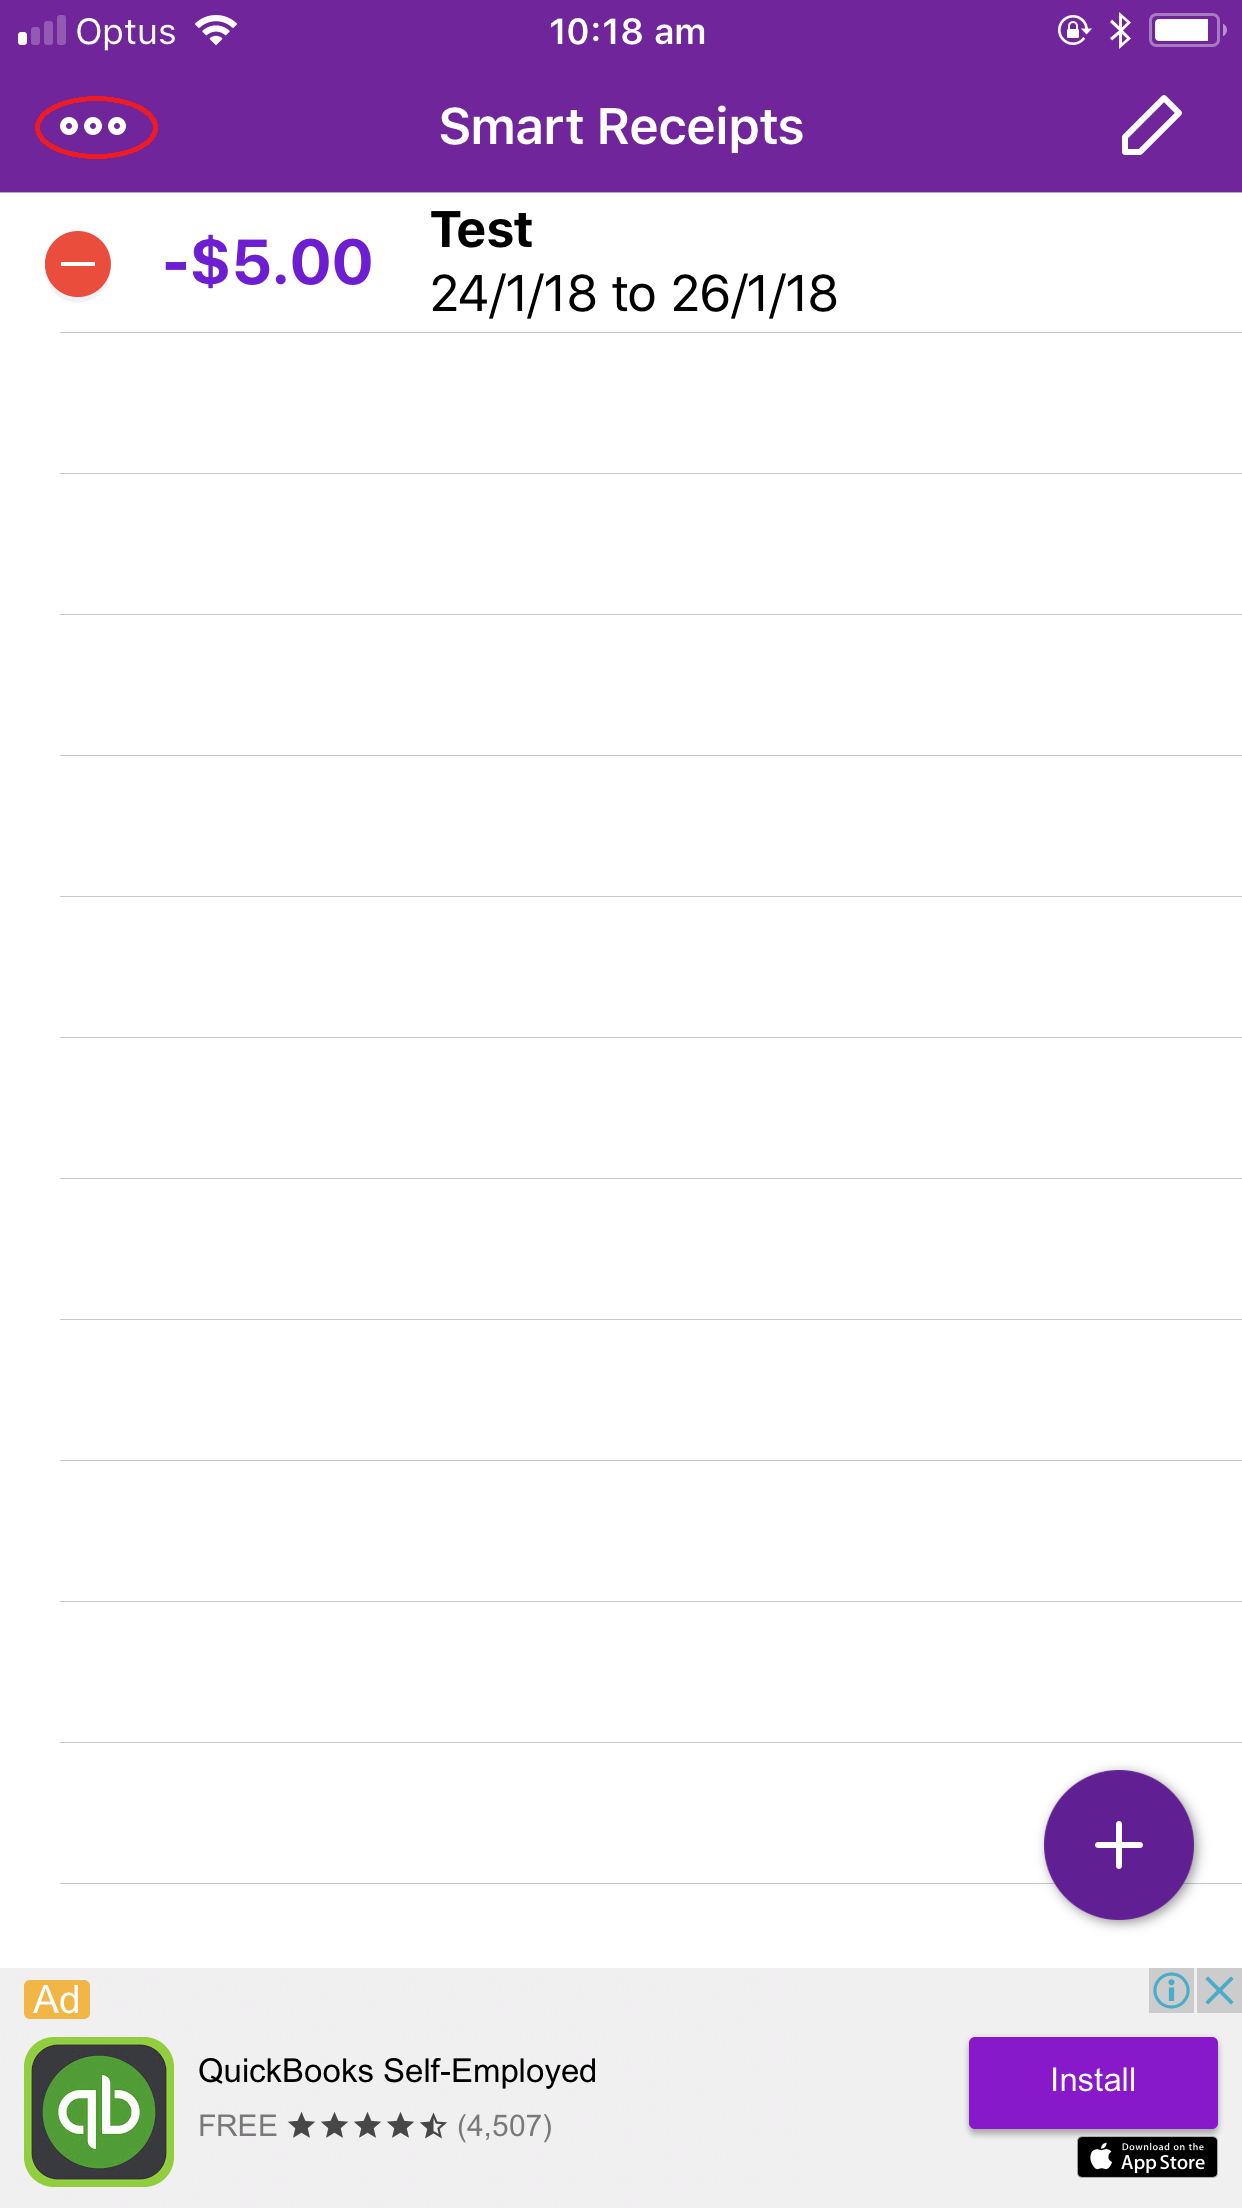
At the end of the expense report period, you now need to generate the report and send it to the Production Accountant.
_______________________________________________
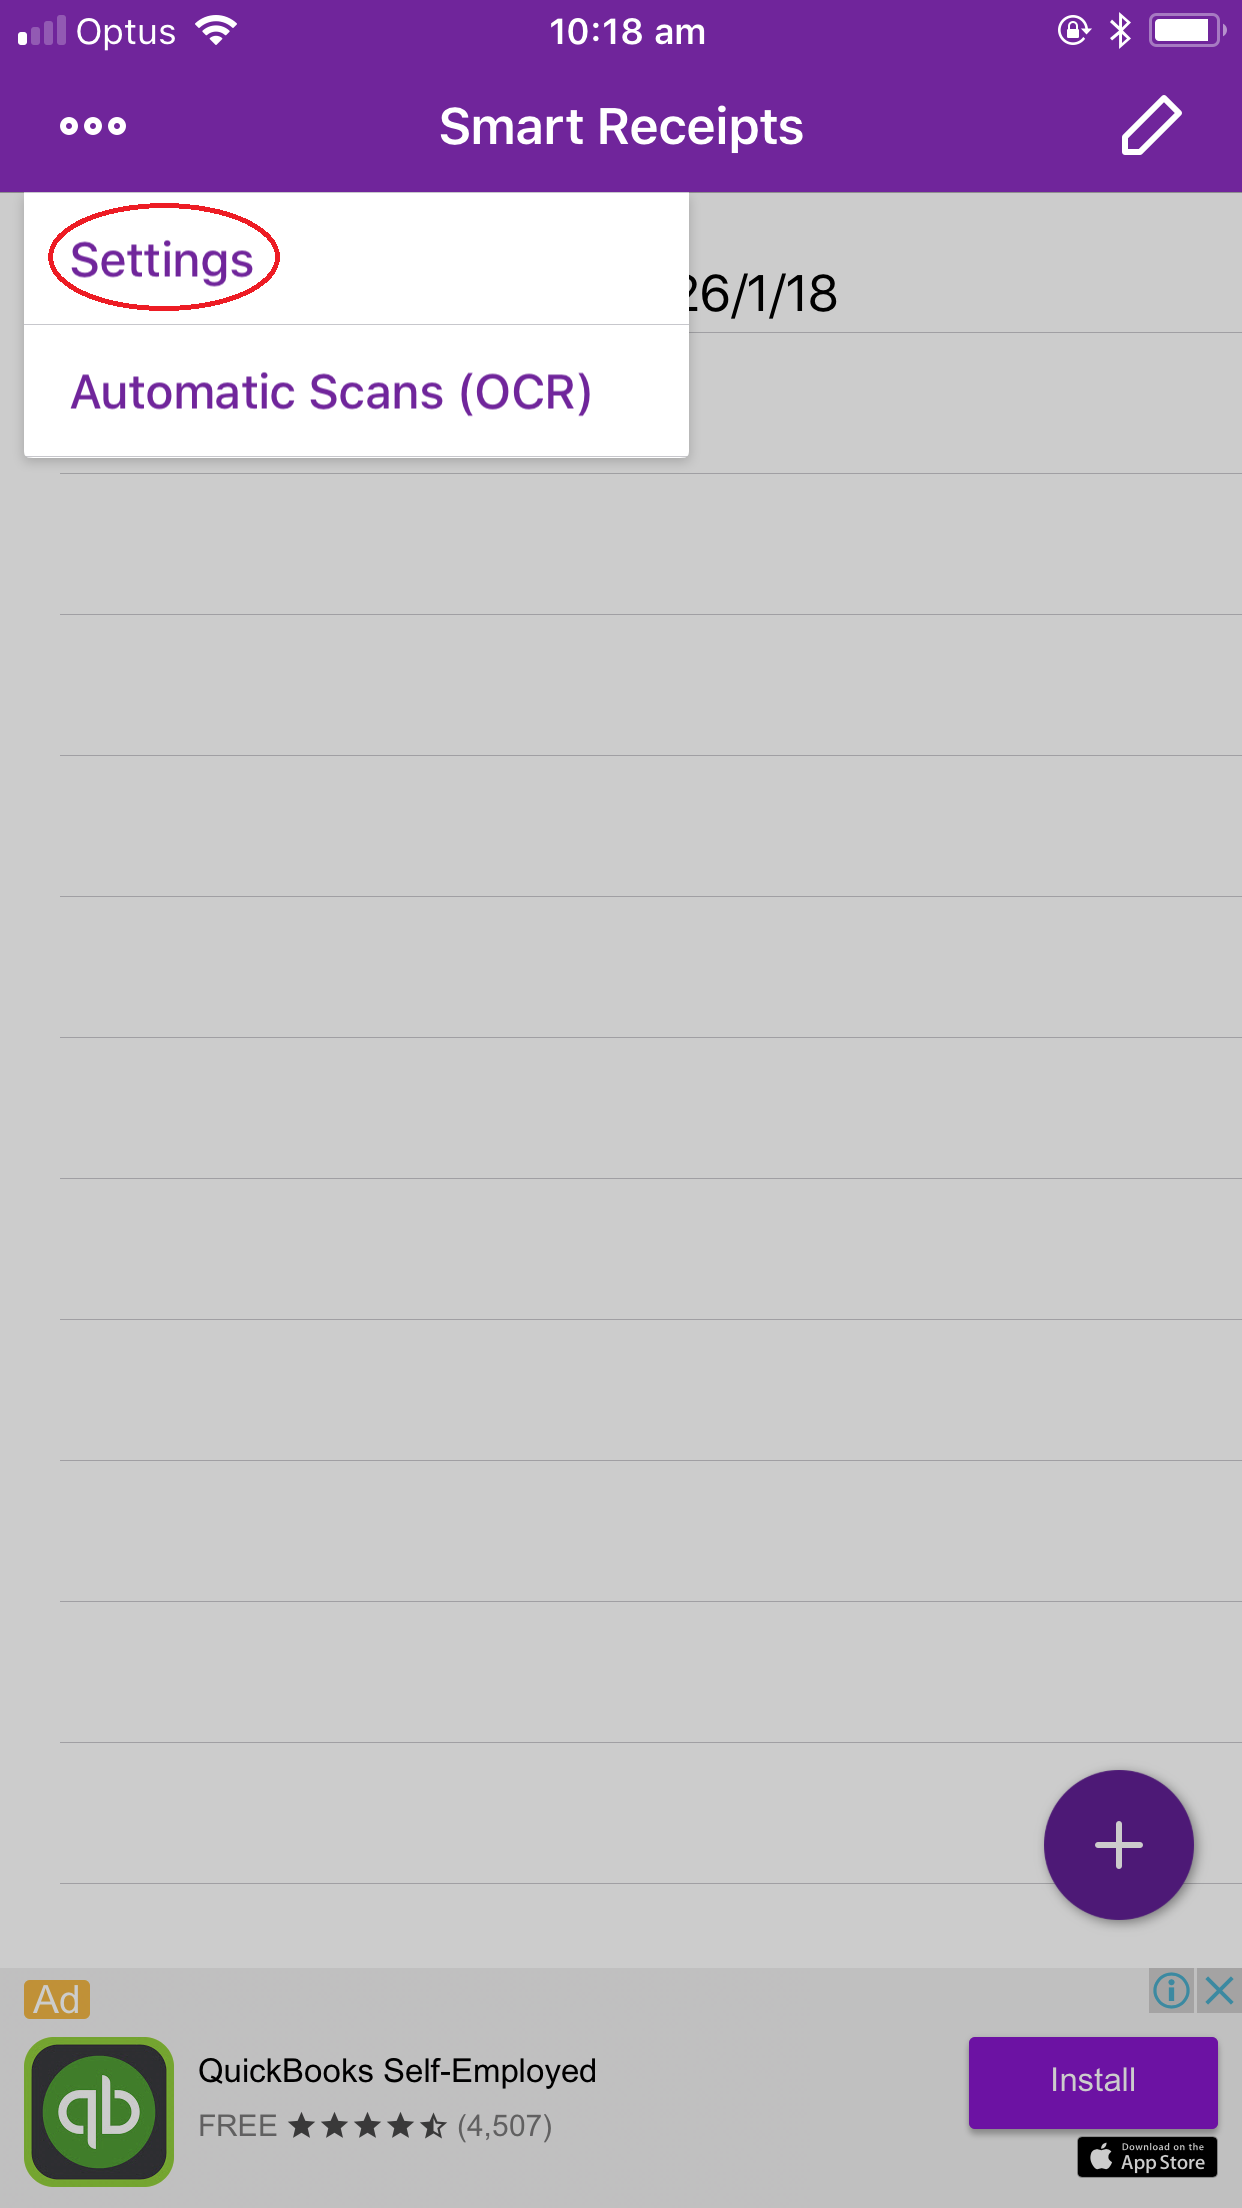
NOTE: For iphone users only.
You will need to customise the CSV report in Settings before you export the CSV file. You will need to this this once only.
On the top left hand corner you will see three circles in a row (as indicated below), click on this
The following menu will appear, select Settings
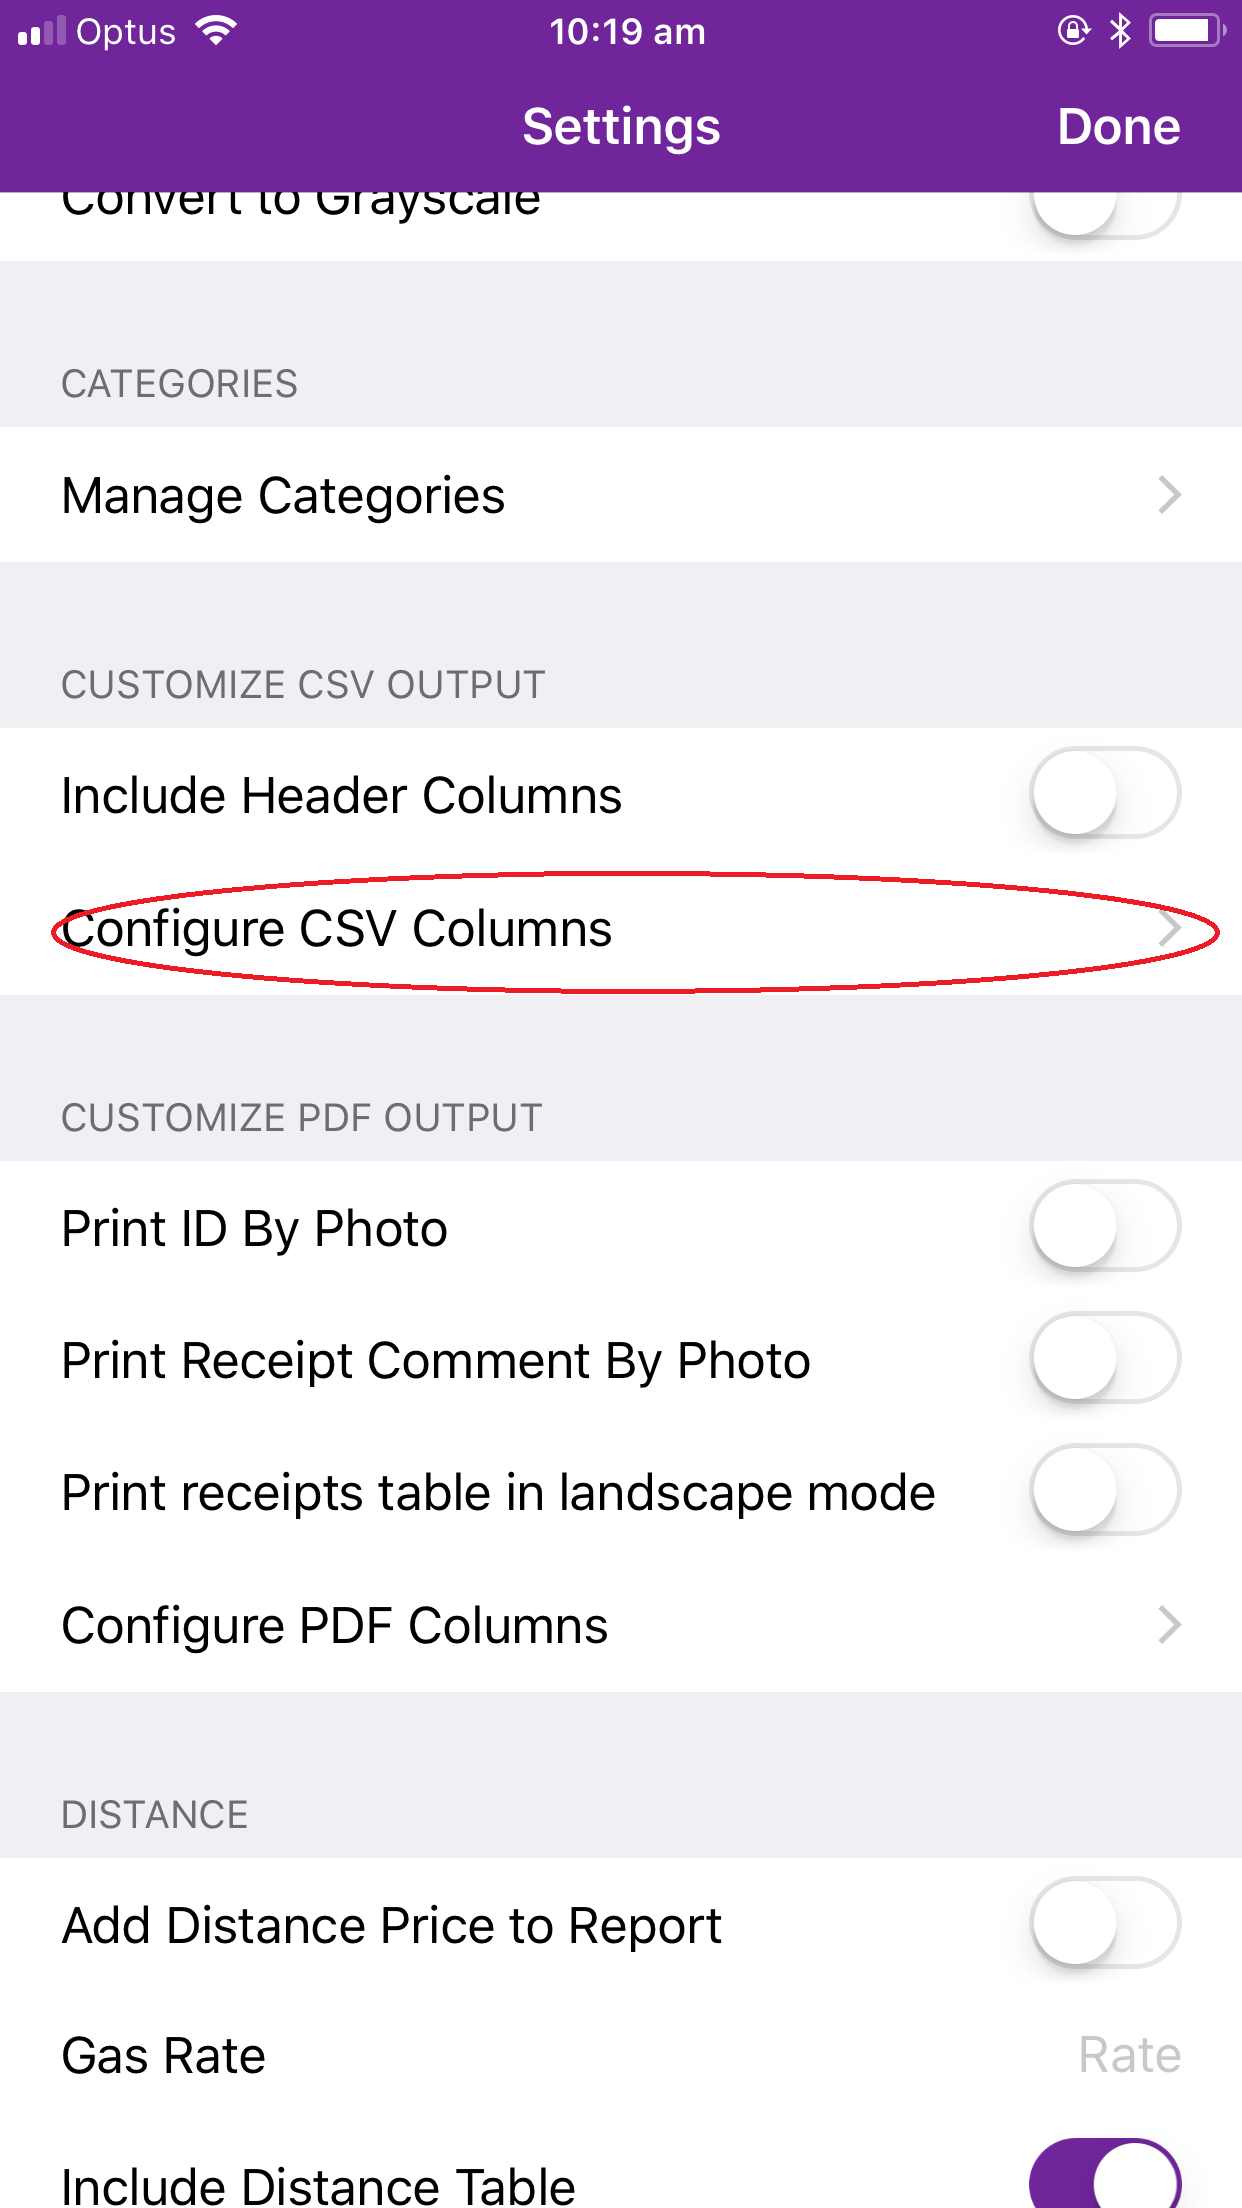
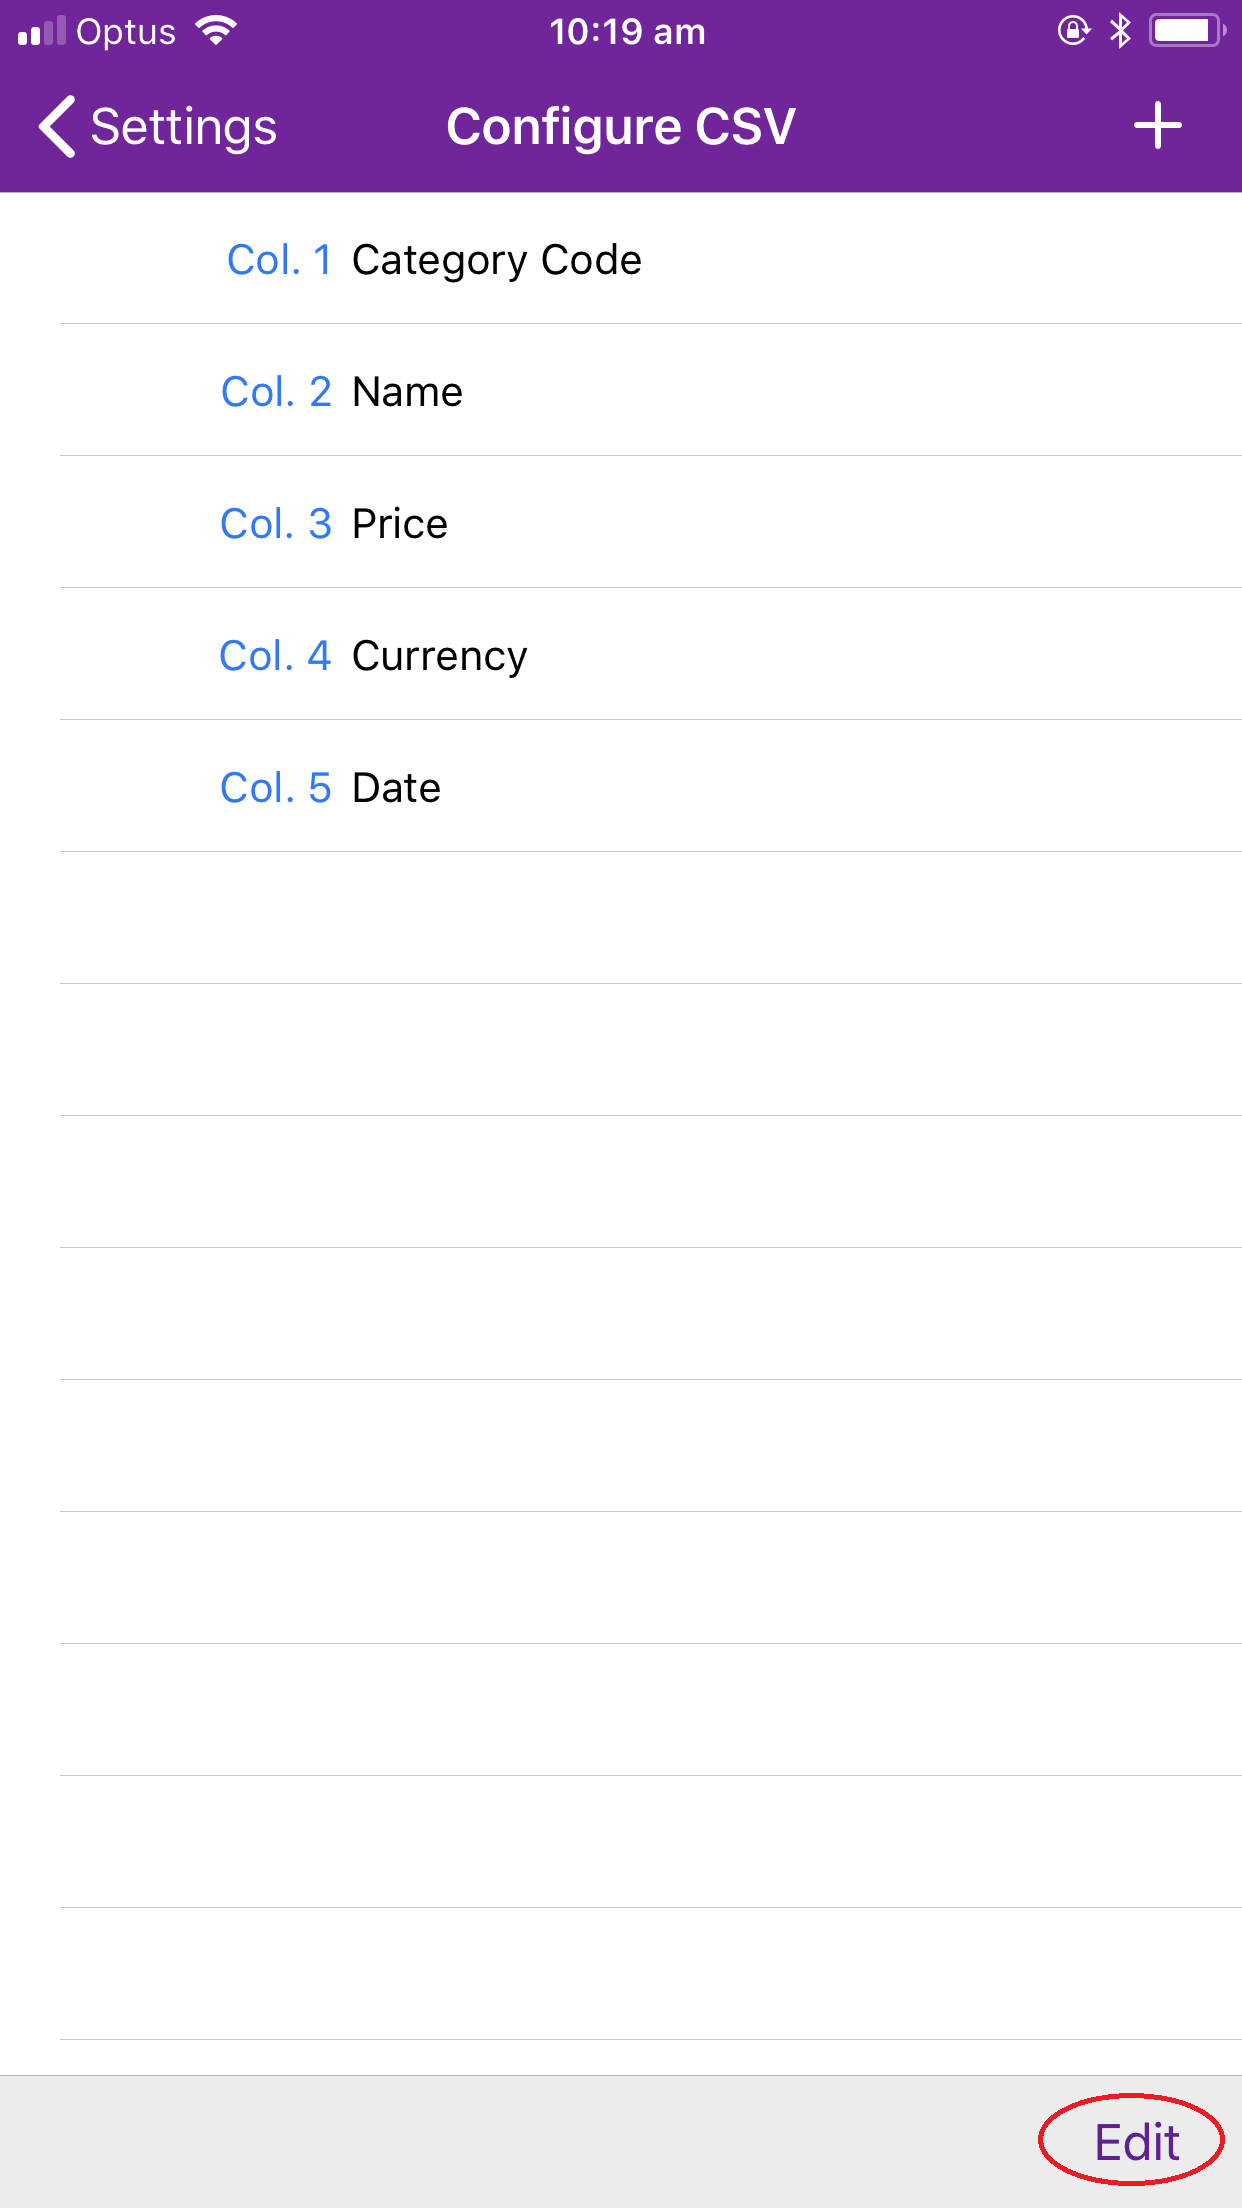
Scroll down to you come to the section Customize CSV output and then click on Configure CSV Columns.
This will show you how the CSV is currently setup. To edit, click on Edit in the bottom right hand corner.
After you have clicked Edit the screen will appear as below. What you need to do is edit the order of the columns, this is done by clicking on the icon indicated below and move the item up or down then release.
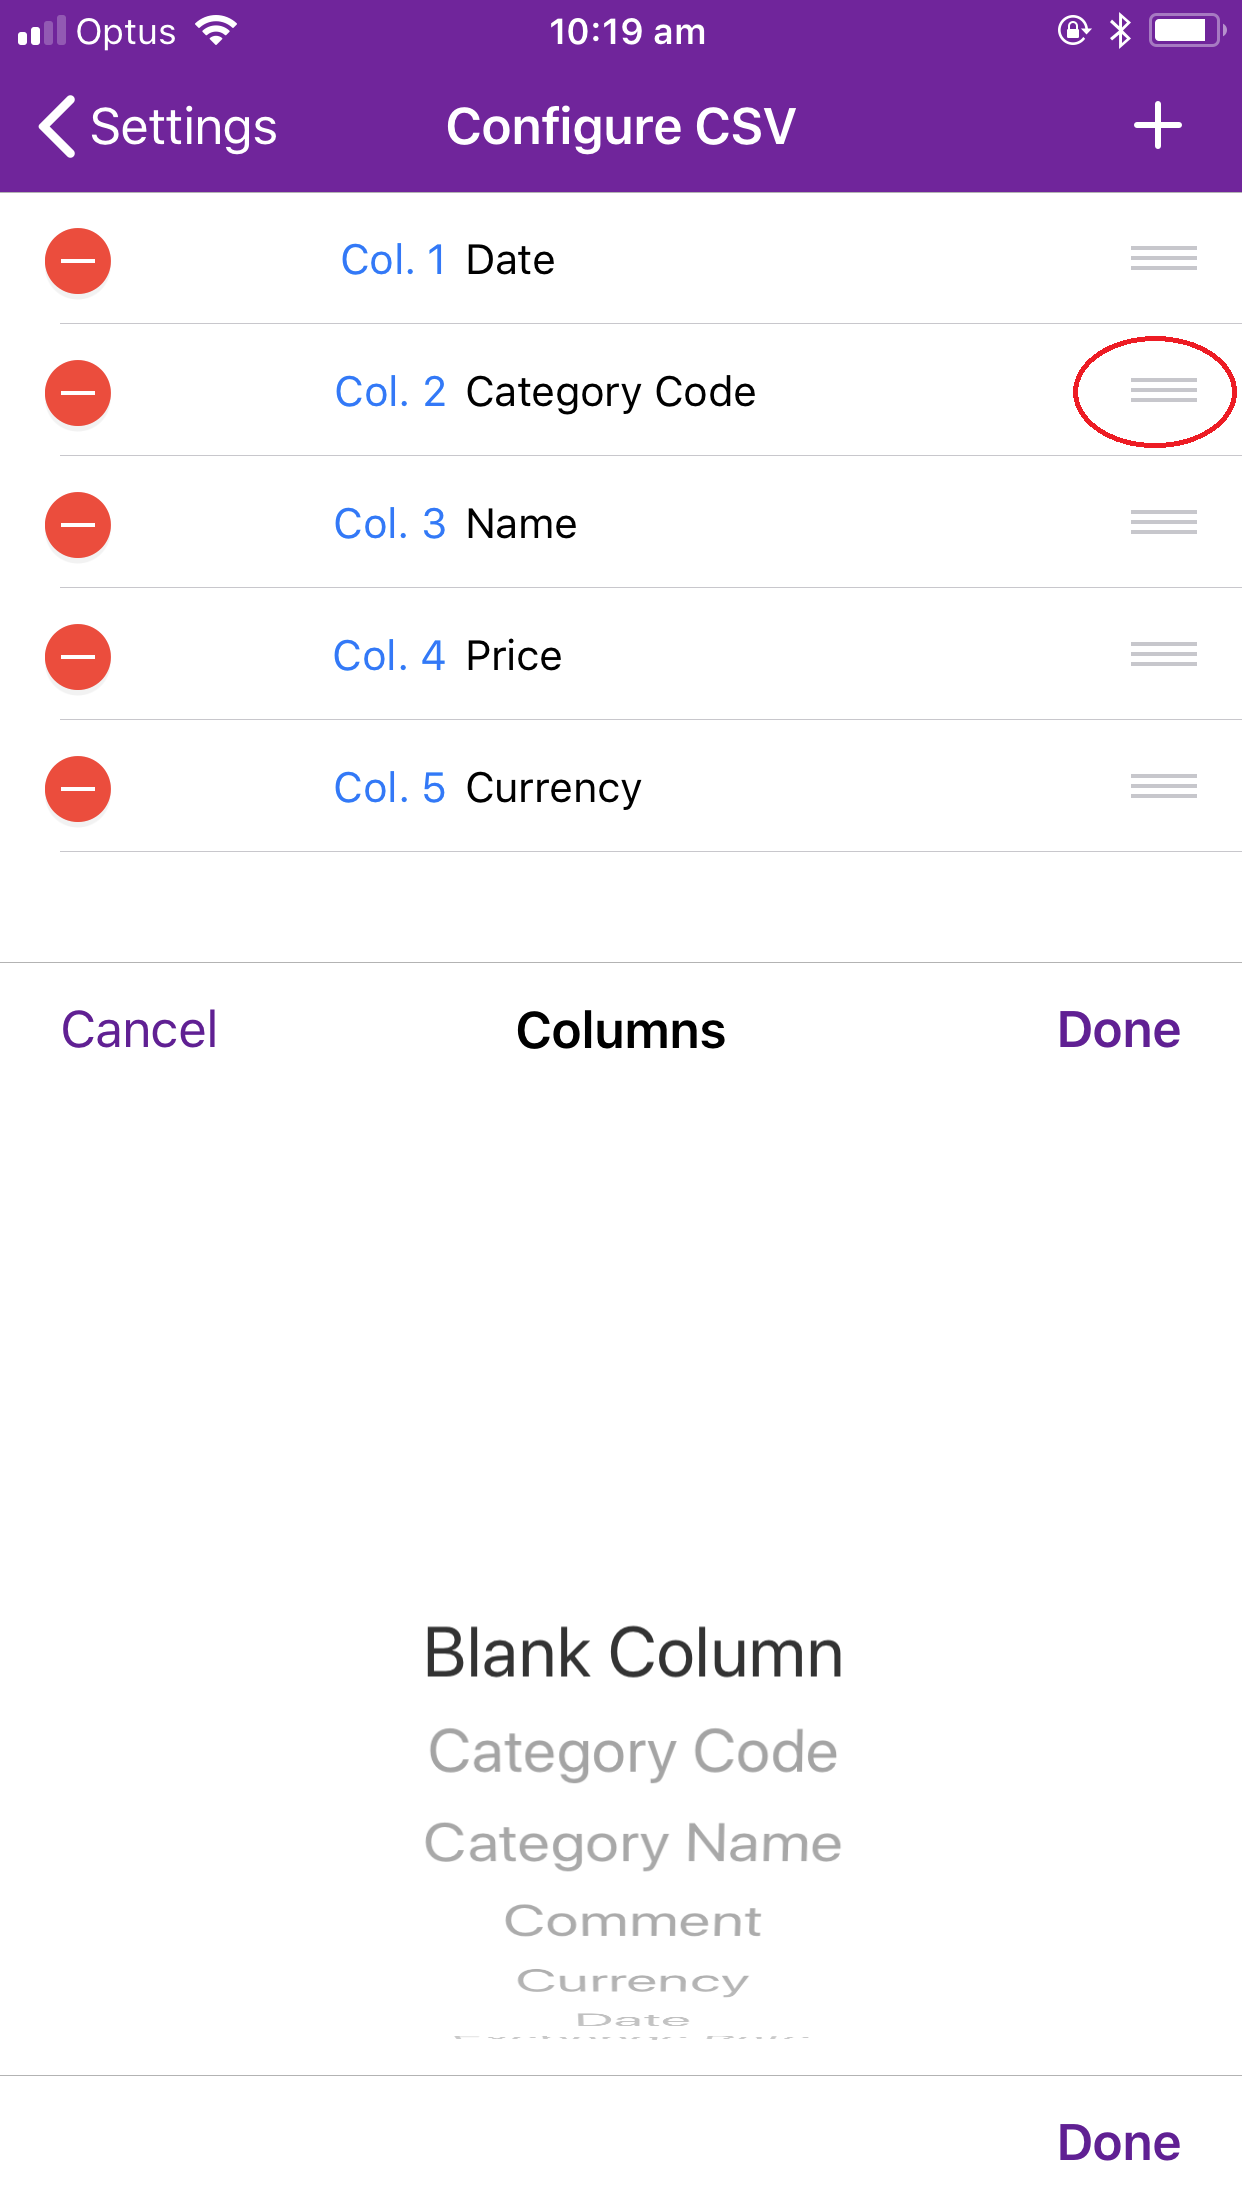 The columns need to be placed in the following order:
Column 1. Date
Column 2. Name
Column 3. Price
Column 4. Currency
Column 5. Category Code
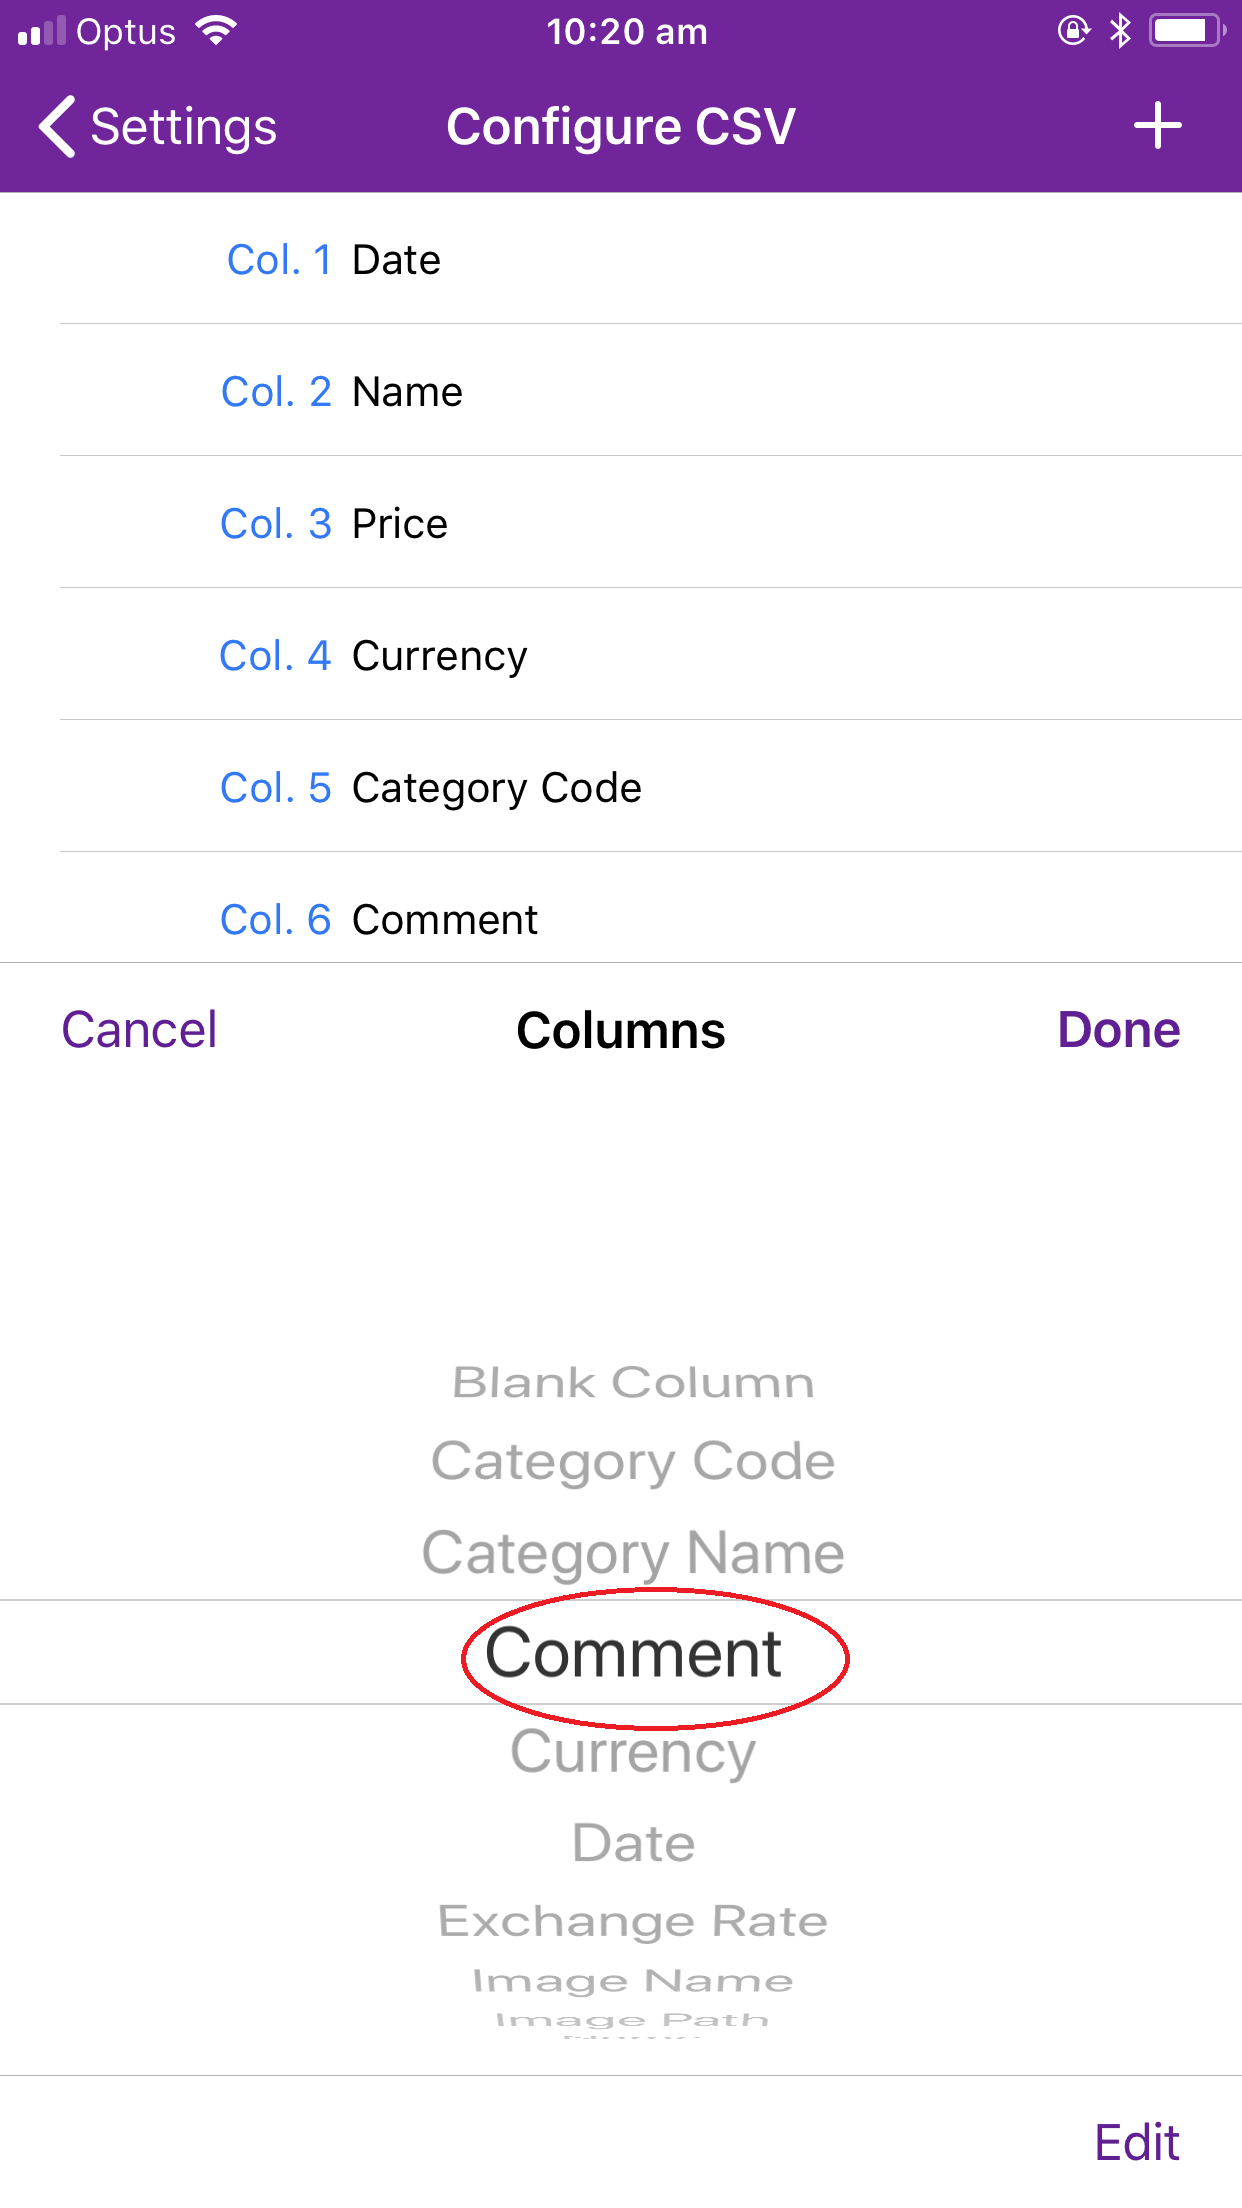
Once the columns are in the order required click Done (bottom right hand corner.
We need to add one more column to the CSV file, click on the + on the top right hand corner and then Select Comment (as below) and then click done.
_______________________________________________
Click on Generate and select CSV File (contains the information to import into PC template file) and PDF Report – No Table (a PDF report of all the photos taken of the receipts).
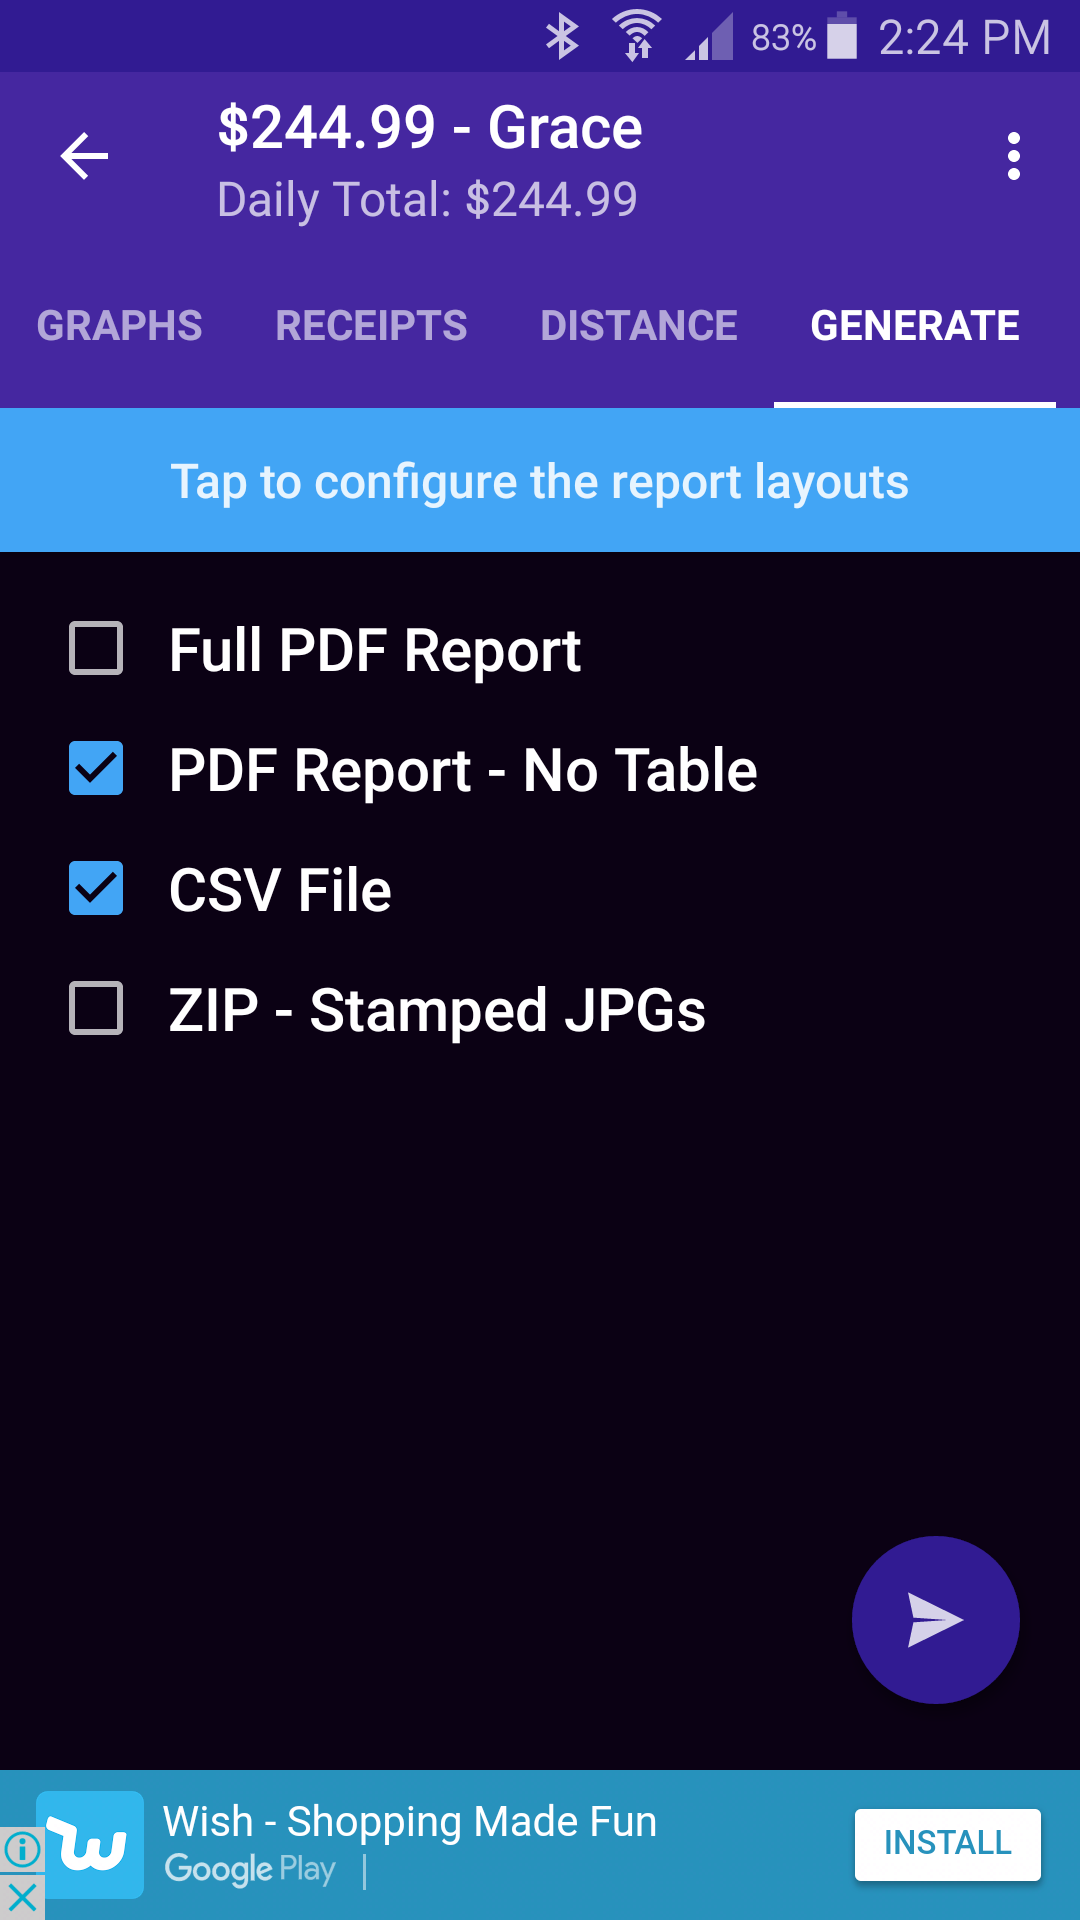
The click the Send button and this will allow you to email these files to yourself or the Production Accountant.
If you have been given Account Codes to use with your Petty Cash reports, then you can do the next step. If not, forward these files onto the Production Accountant.
Open the CSV file that was sent to you and you will see the following:
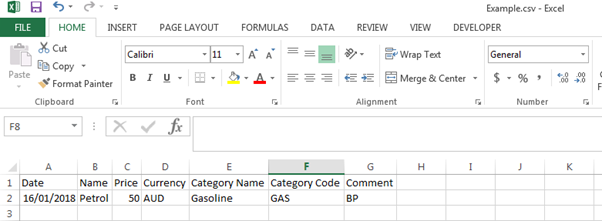
What you now need to do is copy the cells with the information, so for example in this case copy A2-G2.
Then open the Excel file PC_Template using Smart Receipts (Production Accountants would have received this previously from Moneypenny) and click on the worksheet tab DATA DUMP and paste the data in cell A4. Make sure that you do not copy over Column I.
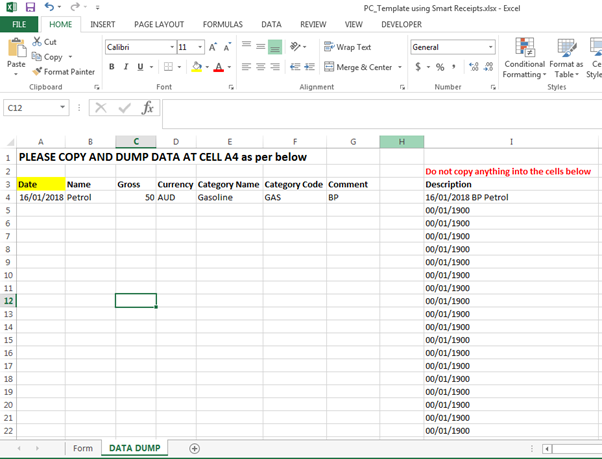
If you now click on the worksheet Tab Form, you will see all of the data is now on the PC Import Template that can be uploaded to the Moneypenny Software.
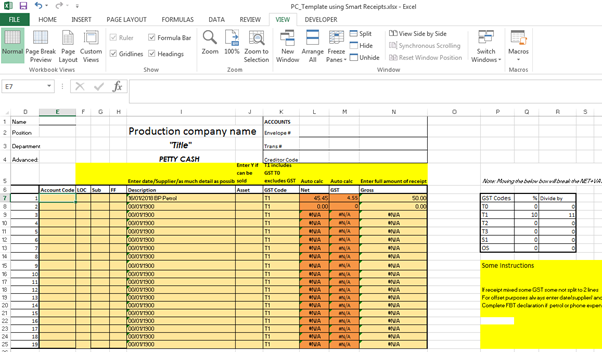
The next step will be enter in the account code for each line and location if applicable.
If one of the receipts does not contain GST, this locate the item in the spreadsheet and change the GST code from T1 to T0 and this will update the spreadsheet.
Once completed, save the file and email it along with the PDF Report – No Table to the Production Accountant to enter into mydaEs.
Production accountants, you can use this PC Import Template with the menu item Petty Cash>Import Petty Cash
You can also attached to the transaction the PDF Report – No Table file which contains a copy of each receipt photo which you took a photo off.
Please note that this template is setup for 19 records only. If you want more lines you can add them. If you are not sure how then please contact mydaEs support and we will be more than happy to assist.